How to Remove a Tick: What to Do in the First 24 Hours
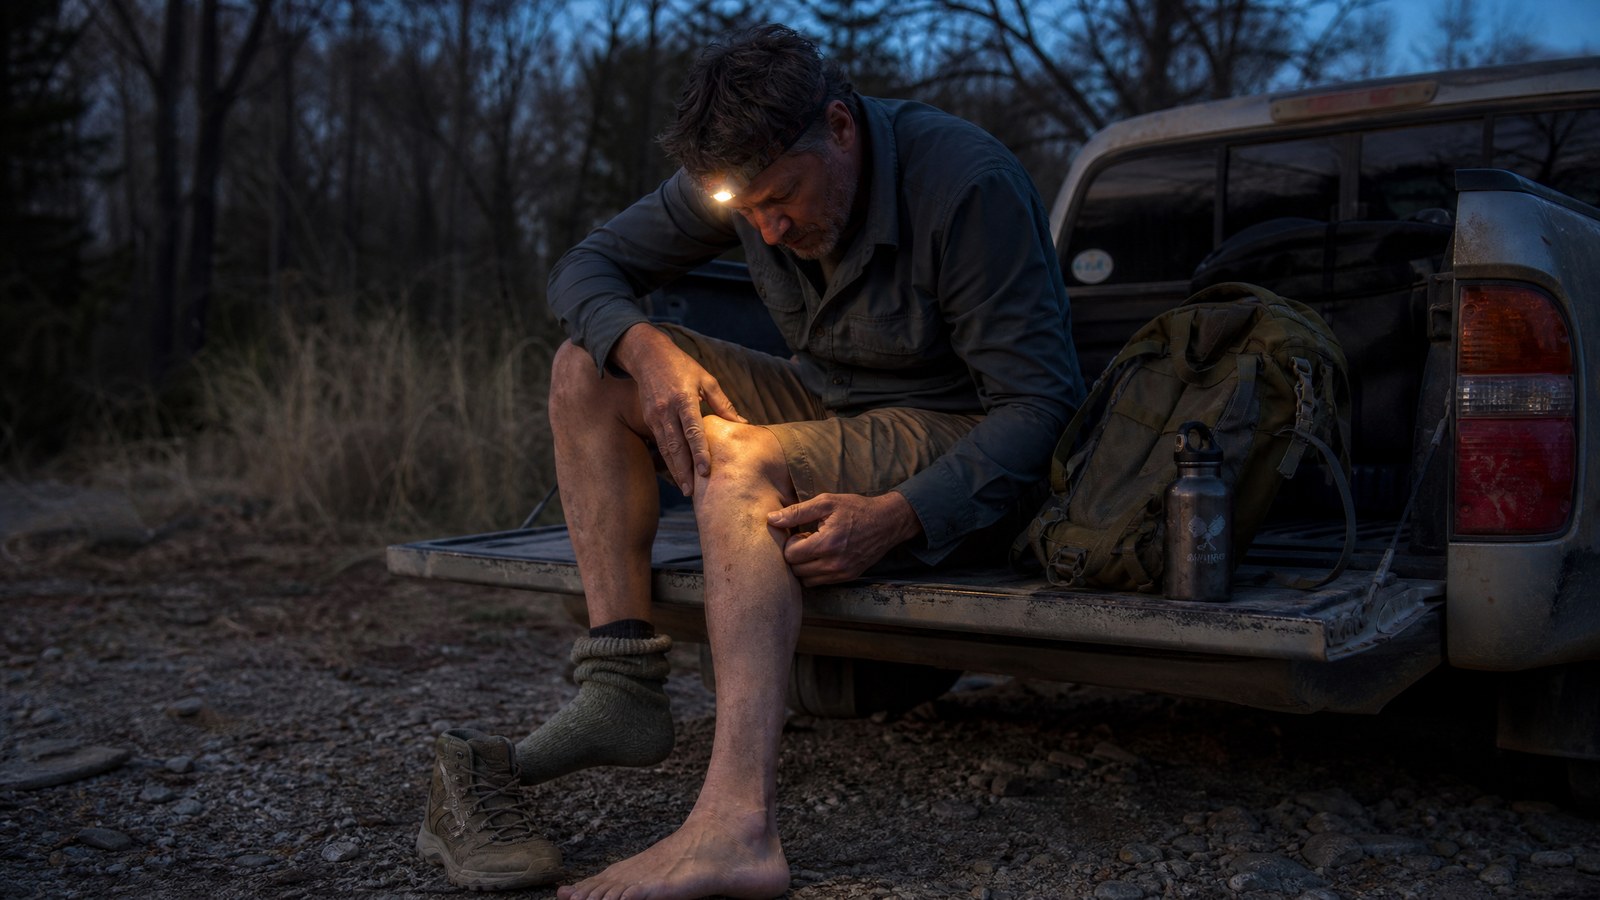
You found it in the shower, or your wife spotted it on the back of your arm, and now you're standing in the bathroom trying to remember whether you're supposed to twist it out or burn it off. Neither. The good news is that removing a tick correctly is a thirty-second job with a tool most people already own. The part that trips people up is everything around it: how long it was attached, whether the mouthparts came out, and what counts as a real warning sign three weeks later. Here's the whole thing, in the order you need it.
Why the First 24 Hours Decide Your Risk
Speed matters more than technique. According to the CDC, a tick usually has to stay attached for more than 24 hours before it can pass along the bacteria that cause Lyme disease. Pull it off inside that window and you greatly reduce your chances of getting sick.
That single fact should change how you think about the whole situation. A slightly imperfect removal done right now beats a textbook removal done tomorrow morning when the hardware store opens. If all you have is your fingernails, use your fingernails.
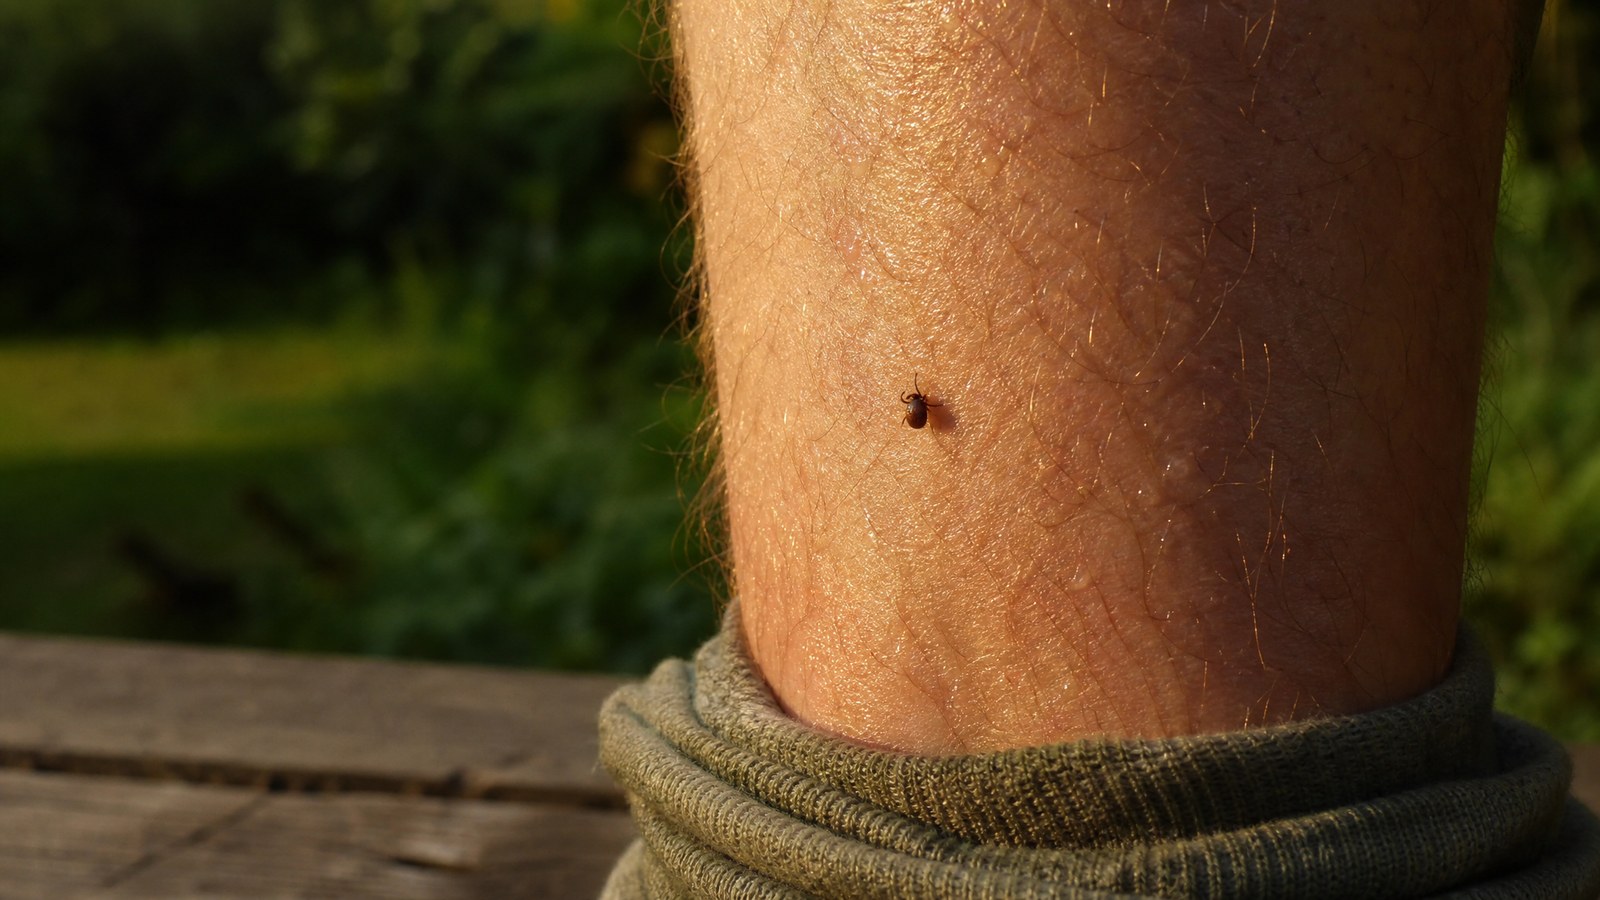
It also explains why tick bites get missed so often. The blacklegged ticks that spread Lyme are tiny. A nymph is about the size of a poppy seed, an adult female about the size of a sesame seed, and nymphs are out in force from April through July. People who end up with Lyme frequently never noticed a bite at all. That's the argument for a real tick check every time you come in from tall grass, brush, or woods, not just when something itches.
How to Remove a Tick in Four Steps
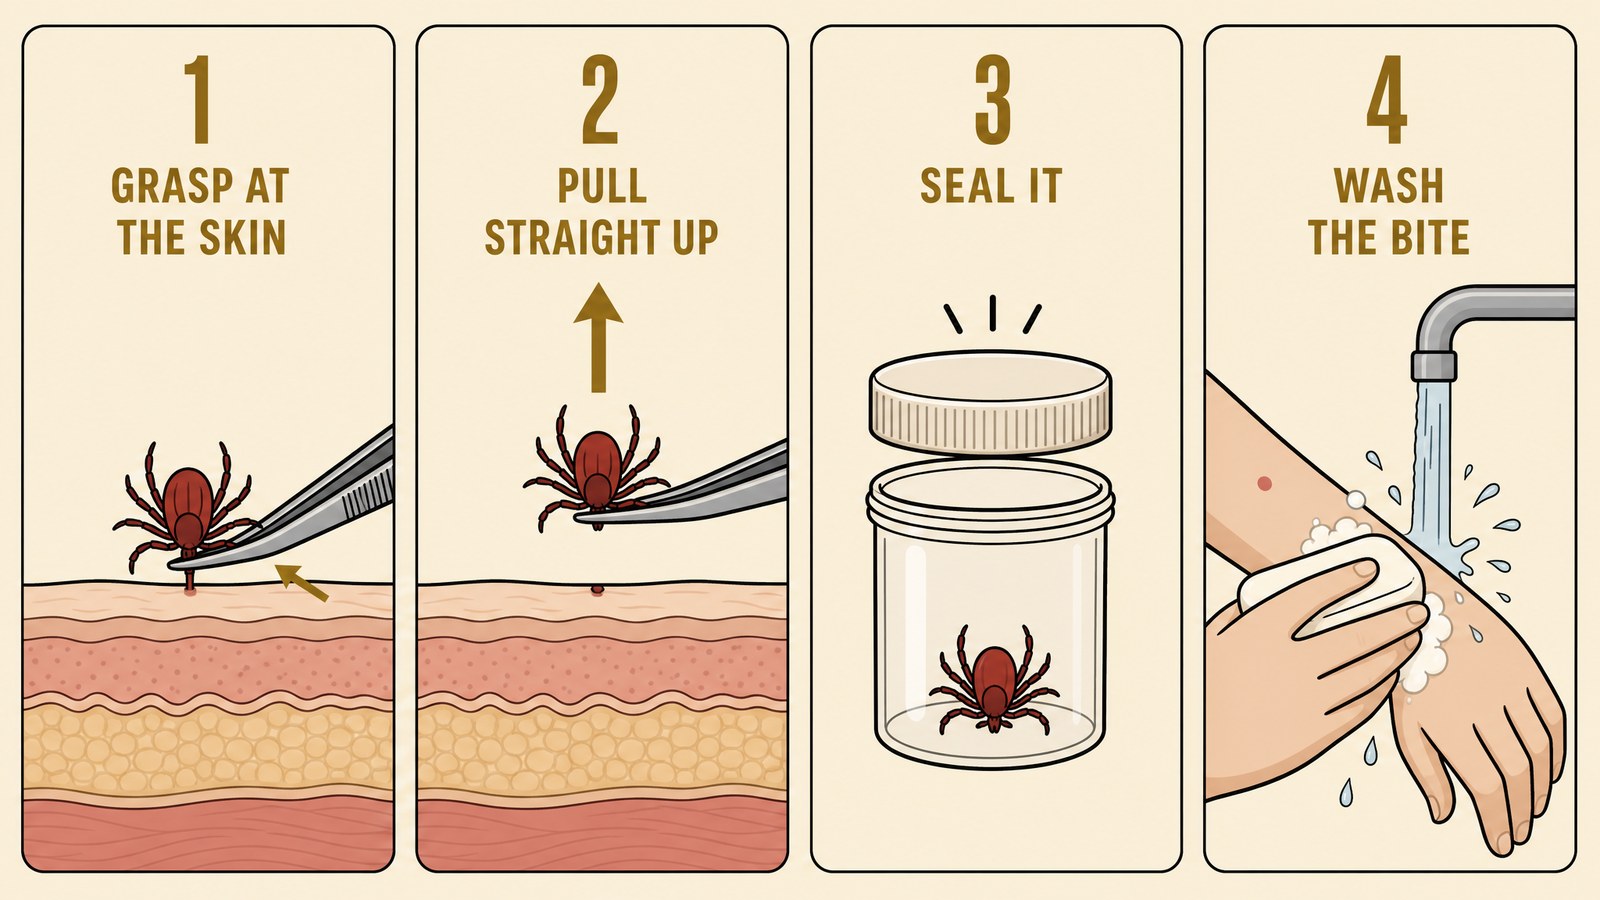
Four steps, and none of them are complicated.
- Grasp it at the skin. Use clean fine-tipped tweezers and get the jaws as close to the skin's surface as you can manage. You're trying to grab the tick where its mouthparts enter the skin, not around the fat part of its body. Squeezing the body can push fluid back into the bite.
- Pull straight up. Steady, even pressure, directly away from the skin. No twisting, no rocking, no sudden yank. It may take a few seconds of firm tension before it lets go. That's normal. Twisting or jerking is what snaps the mouthparts off and leaves them behind.
- Get rid of it. Put the tick in a sealed container, wrap it tight in tape, drop it in rubbing alcohol, or flush it. Don't crush it between your fingers.
- Clean up. Wash the bite area and your hands with soap and water, rubbing alcohol, or hand sanitizer.
Then do one more thing: check the rest of your body. If one tick found you, others may have come along for the ride, and they tend to pick spots you can't see easily.
The Tick Removal Myths That Make It Worse
Most of the folk methods aren't just useless, they actively raise your risk. The CDC is direct about this in its tick bite guidance: don't use petroleum jelly, heat, nail polish, or any other substance to try to make a tick back out on its own. Agitating an attached tick can force infected fluid from the tick into your skin.
Here's what to skip and why.
Petroleum jelly or nail polish. The theory is that you suffocate the tick and it withdraws. In practice you're waiting around with an infected tick still attached, which is the one thing the clock says not to do.
A hot match or lighter. You're holding fire against your own skin next to an agitated parasite. There's no version of this that goes well.
Twisting it out like a screw. Ticks aren't threaded. Twisting increases the odds you tear the mouthparts off at the skin line.
Crushing it with your fingers. Popping a blood-filled tick against broken skin is the exact exposure you're trying to avoid.
Waiting for a doctor's appointment. This one surprises people. The CDC says plainly not to delay removal in order to have a professional do it, because the delay itself raises your risk. Take it out now, then call if you have questions.
What to Do If the Mouthparts Break Off
It happens, and it's less serious than it looks. If a small dark speck stays in the skin after the body comes away, try once to lift it out with the tweezers. If it doesn't come easily, leave it alone. Your skin will push it out on its own as the bite heals, the same way it handles a splinter.
What you shouldn't do is dig. Gouging at the spot with a needle or squeezing it hard turns a pinhole into an open wound you now have to worry about for a different reason. Watch for the ordinary signs of a skin infection over the following days: spreading redness, warmth, swelling, pus, or pain that gets worse instead of better. Those signal a wound problem, and untreated they can turn into something more serious. We covered how that escalates in our piece on sepsis warning signs.
One reassurance worth stating plainly, since it drives a lot of panic searches: leftover mouthparts are not a tick that's still feeding. The tick is gone. There's nothing left to transmit anything.
How to Remove a Tick From a Dog or a Spot You Can't See
The technique doesn't change. The logistics do.
On a dog, part the fur down to the skin with your free hand and hold it open before you bring in the tweezers. Dogs squirm, so a second person holding the dog steady is worth more than any specialized tool. Check the usual hiding places: inside the ears, under the collar, between the toes, in the armpits, and around the tail. Ticks your dog carries in can end up on you later, which is a decent reason to keep a pair of fine-tipped tweezers wherever the leash lives.

On yourself, the hard spots are the scalp, the back, behind the knees, the groin, and the waistband line. Get someone else to do it if you can. If you're alone, use two mirrors or your phone's camera rather than working blind. Good light and a clear view matter more here than steady hands.
If you spend real time outdoors, keep a dedicated pair of fine-tipped tweezers in your pack rather than relying on the blunt drugstore pair in the medicine cabinet. Our home first aid kit checklist covers what belongs in the kit and what's just taking up space, and the wilderness survival plan covers the rest of what should be in a day pack before you hit the trail.
What to Watch For in the Weeks After a Tick Bite
A small red bump right at the bite, showing up within a day or two and fading over the next few, is usually just irritation from the bite itself. That's not the pattern to worry about.
The pattern to watch for is a rash that shows up days to weeks later and keeps growing. Erythema migrans, the Lyme rash, appears in over 70% of Lyme cases. Per the CDC, it typically starts 3 to 30 days after the bite, expands slowly over several days, and can reach 12 inches or more across. Sometimes the center clears as it spreads, which produces the bull's-eye look everyone has heard about. It's often warm to the touch but rarely itchy or painful, and that combination is the tell. An itchy rash that appeared within hours is far more likely to be an ordinary bite reaction.
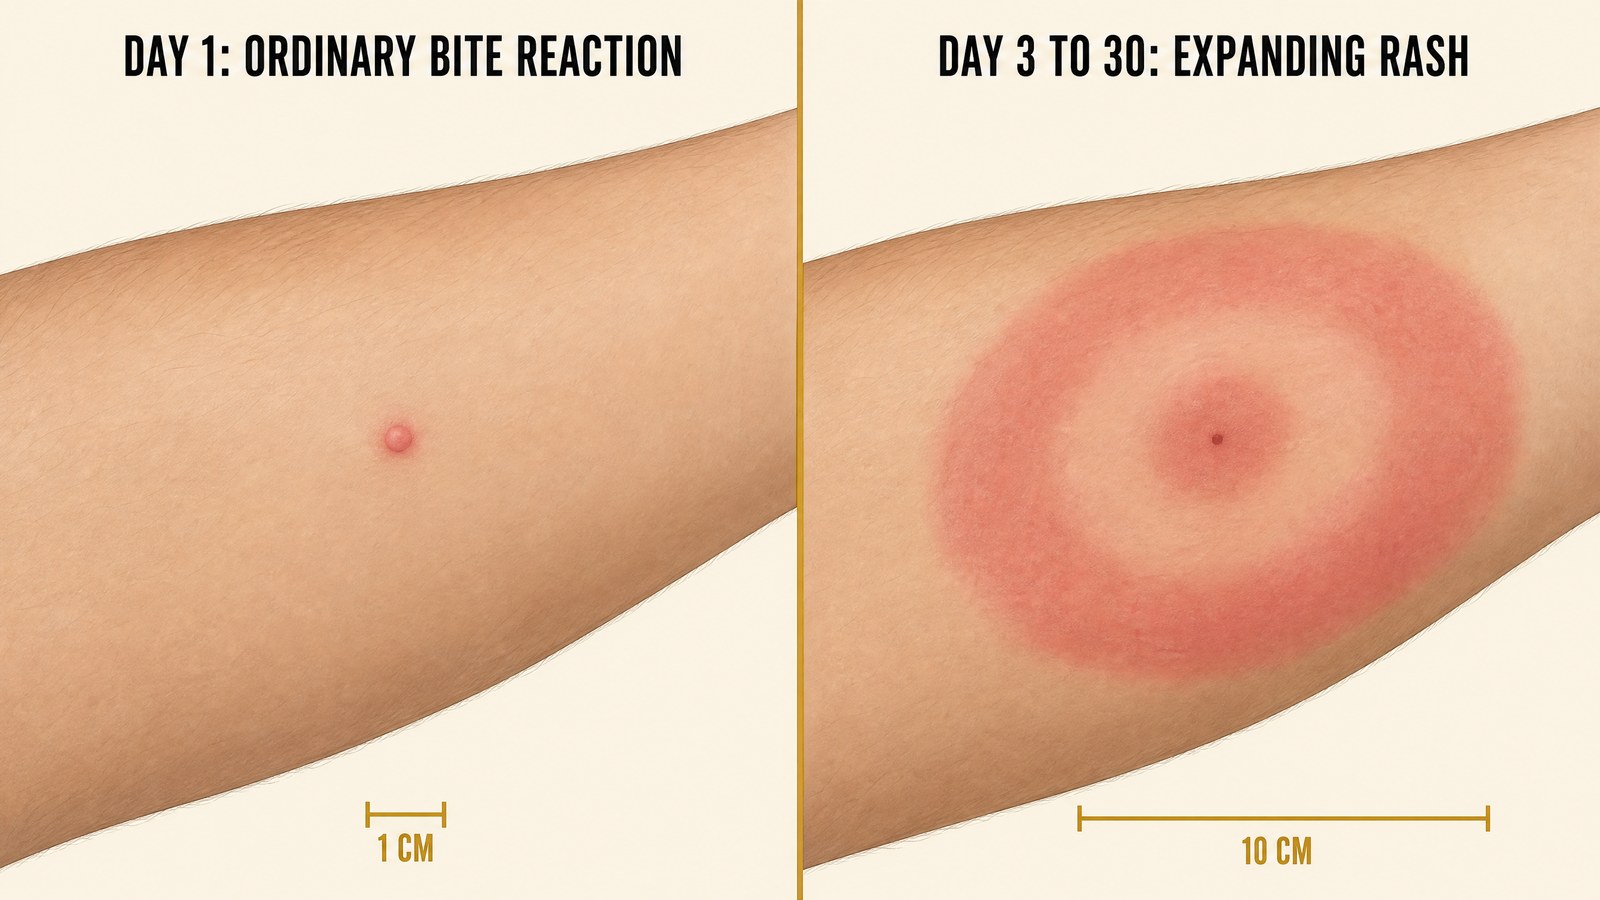
Worth knowing: the bull's-eye isn't required. Plenty of Lyme rashes are solid ovals, bluish patches, or expanding areas with no central clearing at all. Waiting for a textbook target shape before calling the doctor is how people miss it.
Fever is the other signal, and with Rocky Mountain spotted fever it usually comes first. The CDC notes that RMSF starts with fever, headache and muscle aches, and that the rash typically doesn't appear until 2 to 4 days after the fever begins, sometimes later. RMSF can turn serious fast, and treatment works best when it starts early, so a fever in the weeks after a tick bite is a reason to call rather than wait and see.
When a Tick Bite Needs a Doctor
Call your doctor if any of this shows up in the days or weeks after a bite:
- A rash at or near the bite site that keeps expanding
- Fever, chills, headache, deep fatigue, or body aches
- Joint pain or swelling
- A stiff neck, facial drooping, or new nerve symptoms
- Signs of infection at the bite itself
When you call, give three details: that you had a tick bite, roughly when it happened, and where you most likely picked it up. Geography and timing shape what your doctor tests for and how urgently they treat.
One thing not to bother with is commercial tick testing. The CDC doesn't recommend it. Those labs aren't held to clinical diagnostic standards, a positive result on the tick doesn't mean you were infected, a negative one can give false comfort, and if you're going to get sick you'll usually show symptoms before results come back. Save the tick in a sealed bag if you want your doctor to identify the species, then treat symptoms as the thing that matters.
Something else worth carrying: this is the same principle behind almost every outdoor injury. What you do in the first hour, with what you already have on hand, sets up everything that follows. That holds for snake bites and dog bites as much as it does for a tick on the back of your knee.
Fine-tipped tweezers are the whole toolkit for this job, and almost nobody has a pair in the place they actually need them. The 1stHour Trauma Kit is built around the same idea: the gear that matters is the gear within arm's reach when something happens, not the gear in a cabinet at home. 82 pieces of real medical equipment, organized so you're not searching when the first hour is the one that counts.
This content is for informational purposes only and does not constitute medical advice. If you develop a rash, fever, or other symptoms after a tick bite, contact a healthcare provider.


