How to Make an Arm Sling From What You Already Have
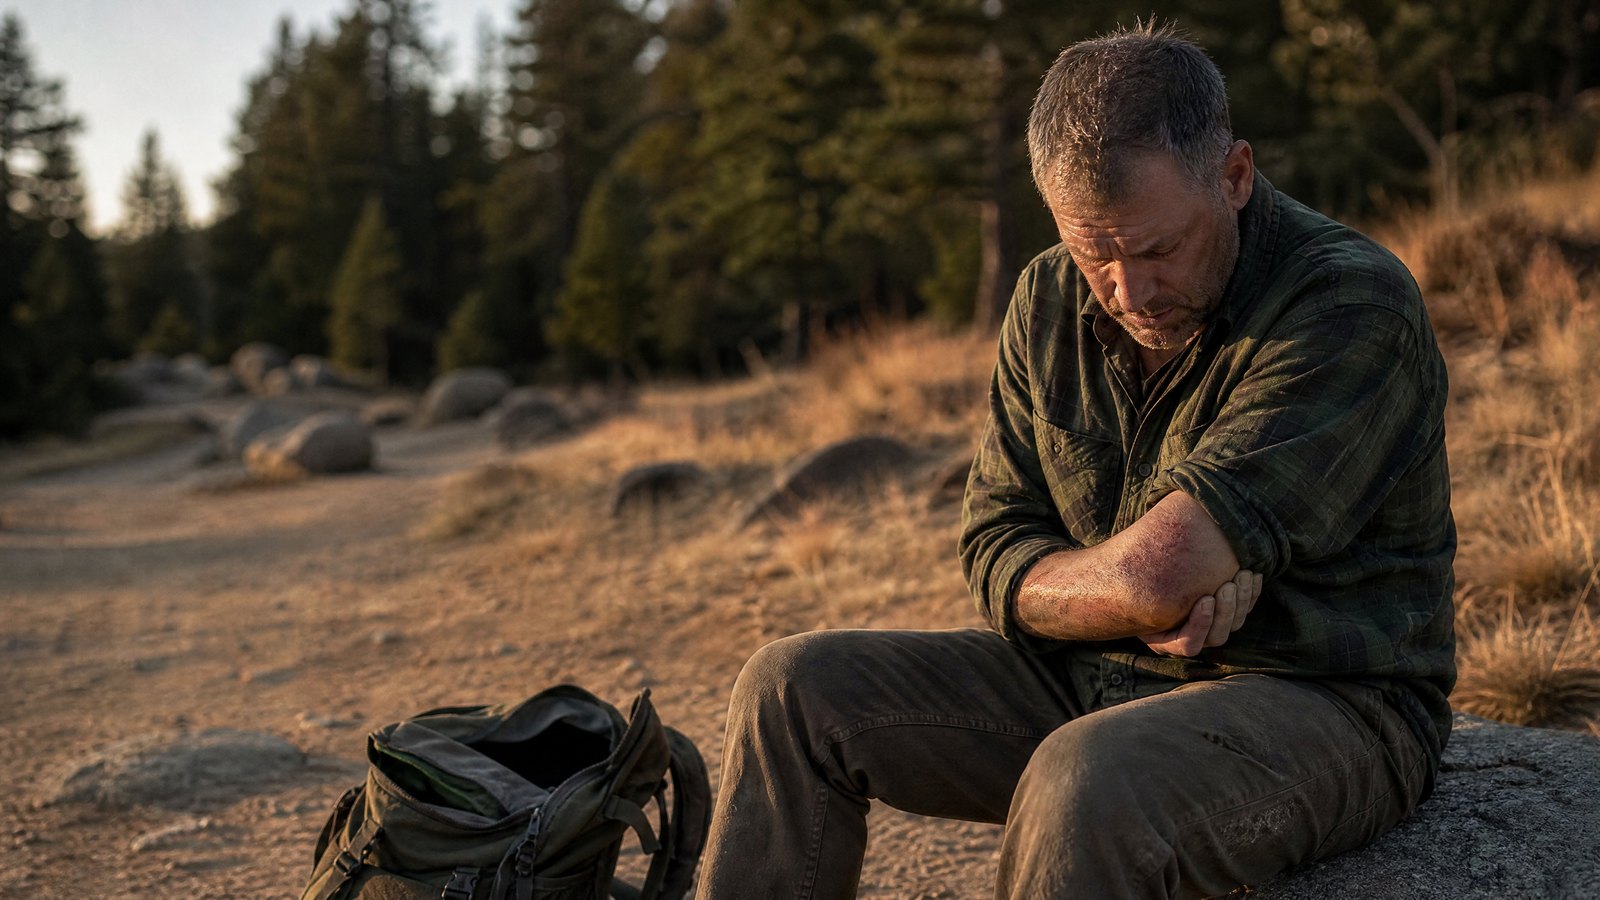
Somebody has come off a ladder, or gone down on a trail, or landed badly at a game. The arm is being held against the body in that way people hold an arm when the message from it is clear. You are not going to fix the injury standing there. What you can do is stop the arm from moving, which takes the edge off the pain and keeps a bad injury from getting worse on the drive in. That is what a sling is for. Here is how to make one out of a shirt, a bandana or a jacket, and the two or three things almost nobody tells you about doing it.
What an Arm Sling Actually Does, and What It Doesn't
A sling suspends the forearm from the neck and holds it against the chest. That takes the weight of the arm off the shoulder, the collarbone and the elbow, and it stops the small movements that make an injury hurt with every step you take.
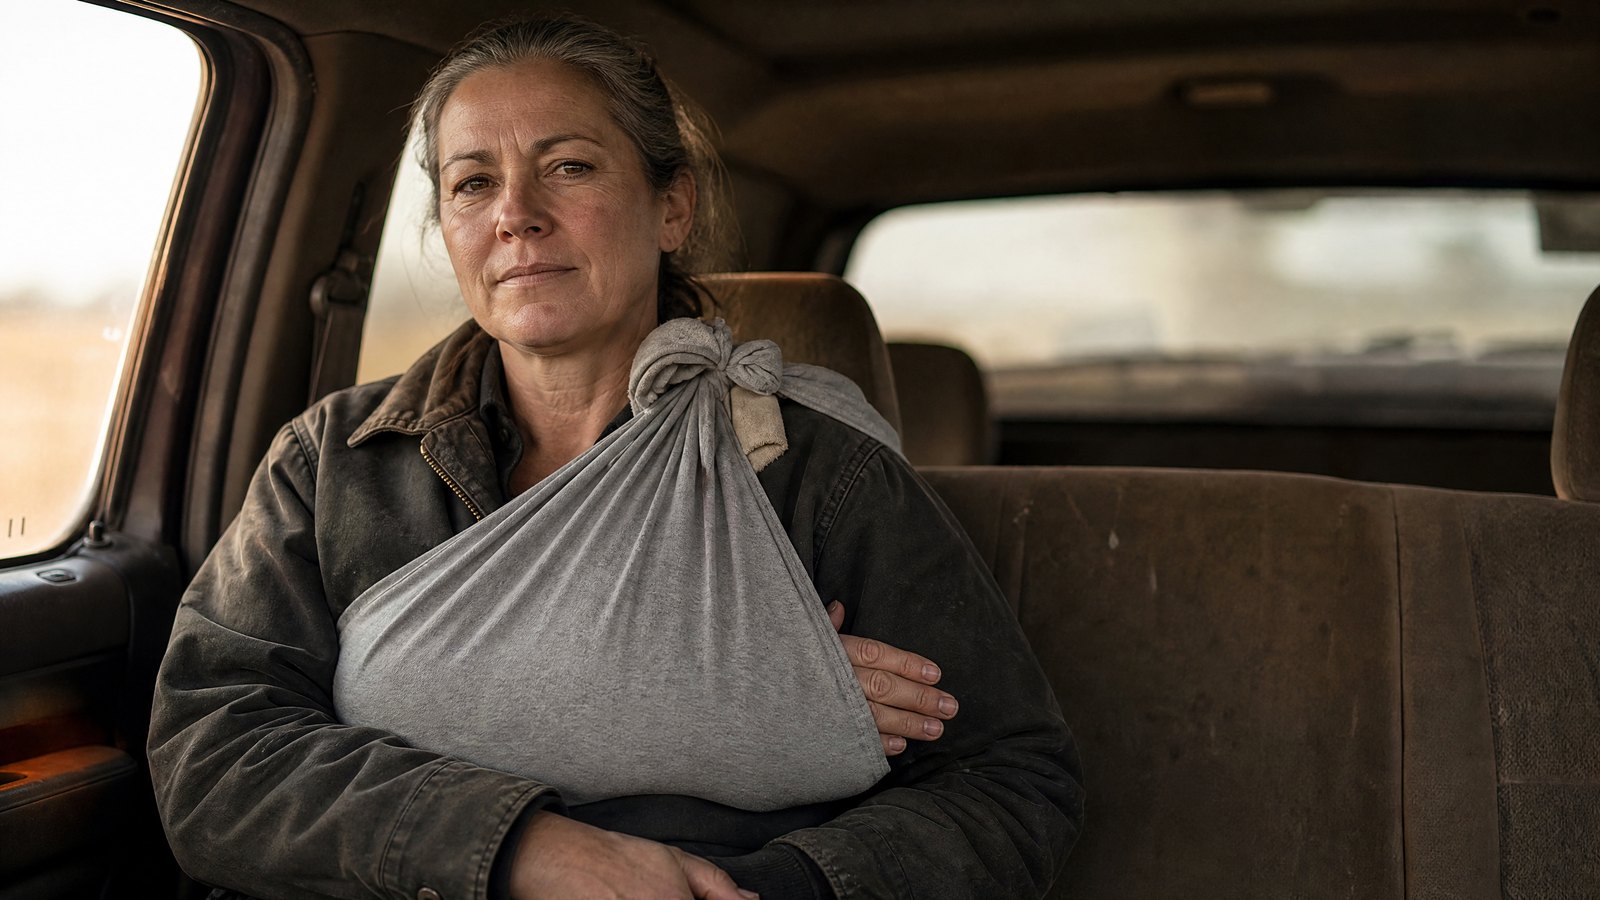
That is the whole job. A sling is not a splint, and this trips people up. A splint is something rigid, taped or tied alongside a bone to keep the bone itself from bending. A sling is soft. It holds the whole limb still as a unit, but it does nothing to stop a broken forearm from flexing inside it.
The order matters, and MedlinePlus states it plainly: if the injury needs a splint, splint it first, then apply the sling. Our guide to splinting a broken bone covers that half. If you are not sure whether you are dealing with a break at all, how to tell if a bone is broken is the faster read.
A sling also does nothing about a wound. Care for any bleeding first, before cloth goes anywhere near the arm.
Before You Tie Anything: Four Checks
Ninety seconds here saves you from making things worse.
- Look for bone or an open wound. If you can see bone at the injury site, call 911 and leave the arm alone. Cover the wound. That is not a sling situation.
- Do not straighten the arm. Whatever position the arm is in, that is the position it gets slung in. MedlinePlus is blunt about it in its splinting guidance: do not change the position of, or realign, an injured body part. If the arm will not fold to roughly ninety degrees without a fight, do not force it. Support it where it sits and get help.
- Splint first if the forearm or wrist is the problem. Upper arm, shoulder and collarbone injuries usually need the sling only. A forearm or wrist that moves in a way it should not needs something rigid alongside it before it goes in a sling.
- Take a baseline reading of the fingers. Press a fingernail on the injured hand until it goes pale, then let go and count how long the color takes to come back. Under about two seconds is normal. Note the skin temperature and ask whether anything feels numb or tingly. Write it down if you have a phone in your hand. This is the number you will compare against in twenty minutes, and without it the later circulation check tells you almost nothing.
How to Make an Arm Sling in Six Steps
You want a triangle of cloth about five feet along the base and three feet along each of the shorter sides. A square about three and a half feet on a side, folded corner to corner, gets you there.
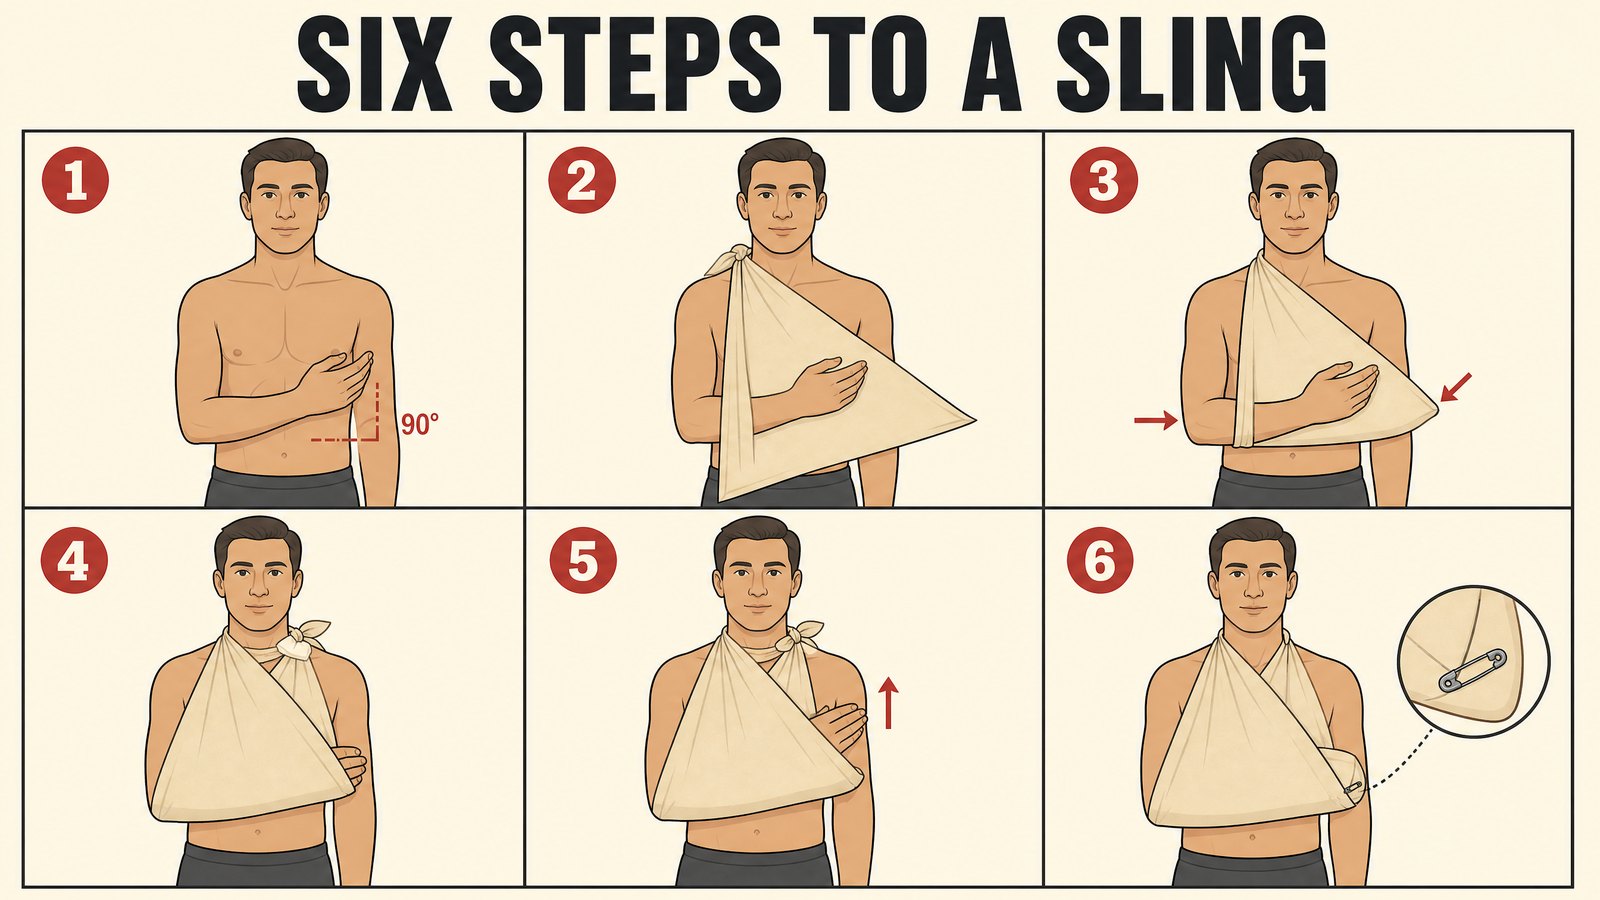
- Support the arm across the chest. Have the person hold it themselves if they can, forearm across the body, elbow bent to about ninety degrees, hand angled slightly upward. Their own grip is gentler than yours.
- Slide the cloth in behind the arm. Long edge running vertically down the body, the point of the triangle out past the elbow on the injured side. One free corner goes up over the shoulder on the good side, the other hangs down over the chest.
- Set the arm on the fabric. Elbow at the point of the triangle, wrist at the middle of the long edge. That geometry is what makes the sling hold the forearm level instead of letting it slide.
- Bring the lower corner up and tie. Take the corner hanging down the chest, bring it up over the shoulder on the injured side, and tie it to the corner already over the good shoulder. Put the knot to the side of the neck, on the uninjured side. St John Ambulance makes a point of this, and so does MedlinePlus. A knot sitting on the spine or on the injured shoulder digs in within minutes. Pad it with a folded sock or a glove.
- Set the height. The hand should end up higher than the elbow. Not level. Higher. An arm that slopes downward inside a sling fills with fluid and swells, which is exactly what you are trying to prevent. The forearm sitting a little above horizontal is right.
- Close the elbow end. The point of the triangle is still loose out past the elbow. Fold it forward along the arm and pin it, tape it, or twist and tuck it into the sling. Skip this and the elbow slides out the back the first time the person turns around.
Two things to confirm before you walk away. The fingertips should be exposed, not wrapped up inside the fabric, because you need to see them. And the sling should support the forearm the full way out to the base of the little finger. A sling that stops at the wrist lets the hand hang, and a hanging hand hurts.
No Triangular Bandage? Use One of These
Most people do not have a triangular bandage within reach. These work, roughly in order of how well:
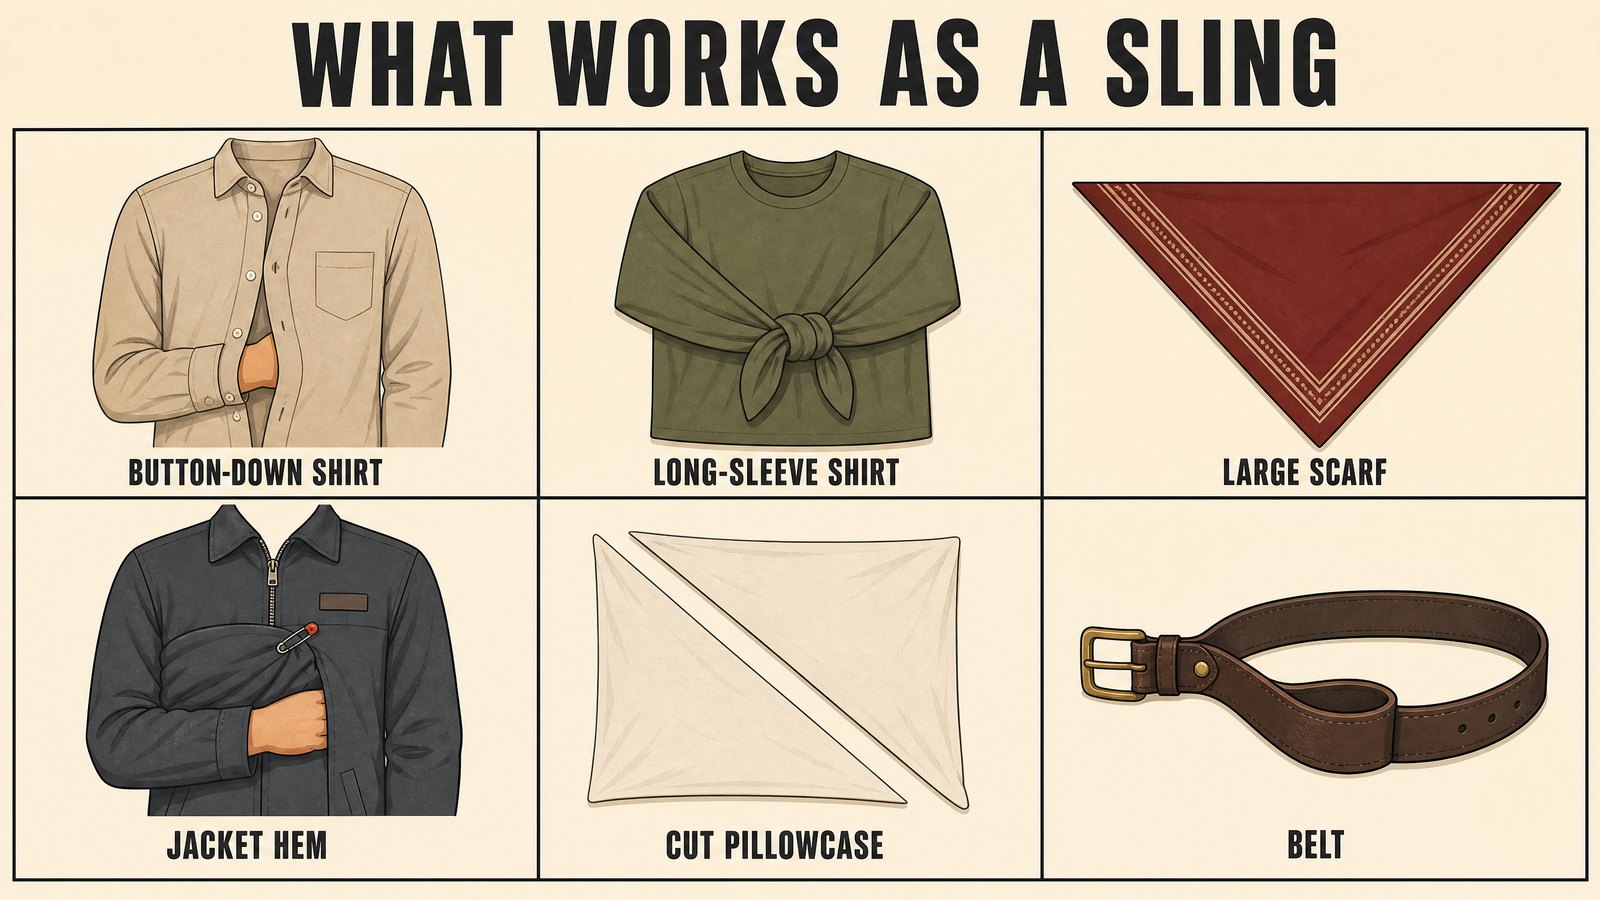
- A button-down shirt already on the injured person. Undo two buttons below the injured arm, tuck the forearm into the gap, button it back over the wrist. It takes about four seconds. It is not adjustable and it will not hold a heavy arm for long, but as a stopgap while you build something better it is the fastest option there is.
- A long-sleeve shirt or hoodie off somebody else. Lay it flat, arm through the body of the shirt, tie the two sleeves behind the neck. The body of the shirt cradles the forearm properly and the sleeves are already the right length.
- A bandana, shemagh or large scarf. Folded corner to corner, this is a triangular bandage. A standard 22-inch bandana runs small for an adult arm. A shemagh or a good square scarf is closer to right.
- A jacket the person is wearing. Zip it partway, slide the arm inside against the chest, and pin the hem up to the chest with a safety pin or two. Works well under a coat in cold weather.
- A pillowcase or towel cut diagonally. In a house or a truck, this is the best material available. A pillowcase cut corner to corner gives you two usable triangles.
- A belt or a backpack strap. Last resort. A belt makes a loop under the wrist and around the neck, which is a rough collar and cuff. It puts all the load on a narrow band and it will hurt, but it beats nothing on a trail.
What does not work: anything stretchy. Elastic bandages sag under weight, the arm drifts down over the next ten minutes, and you get the swelling problem you were trying to avoid. Same goes for anything narrow enough to cut into the neck. A triangular bandage takes up almost no room in a bag, which is why it earns a spot on the home first aid kit checklist and a spot in anything you carry into the backcountry.
Three Sling Variants and When Each One Is Right
Not every arm injury wants the same sling.
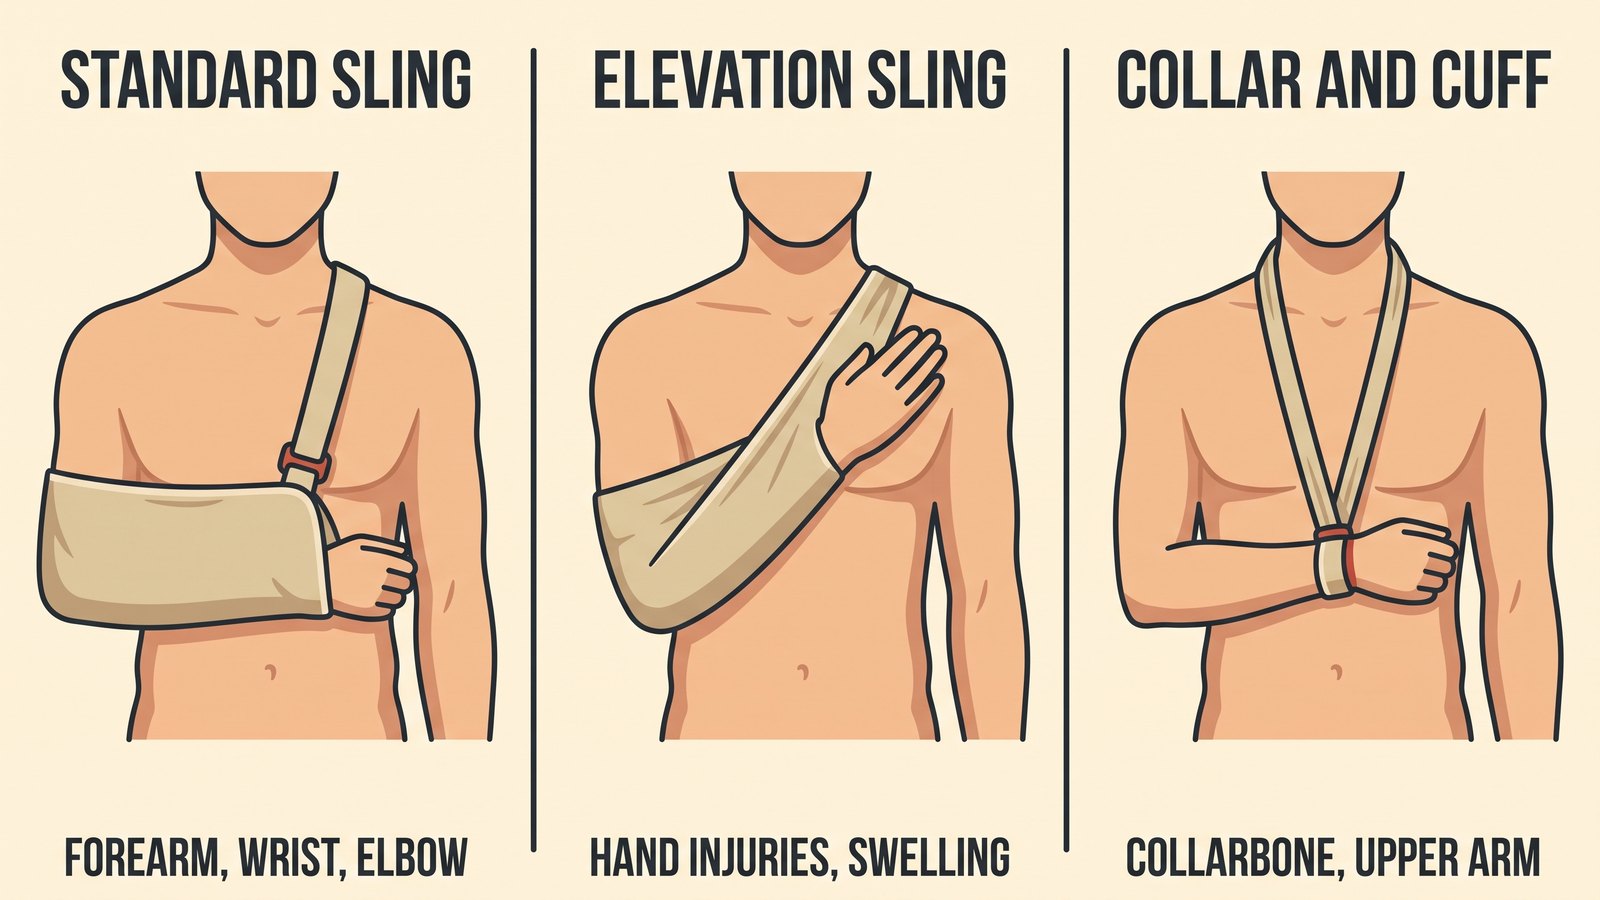
The standard arm sling
Forearm across the chest at ninety degrees, supported to the fingers. This is the default and it covers most of what you will see: forearm fractures, wrist injuries, elbow injuries, and anything where you just need the arm out of the way.
The elevation sling
Same idea, but the hand comes up much higher, fingers pointing toward the opposite shoulder, the whole forearm lying flat against the chest. Use it when the hand or fingers are the injury, when there is bleeding you want above heart level, or when the hand is swelling hard. Gravity does the work.
The collar and cuff
A loop around the wrist and a loop around the neck, nothing under the forearm. The elbow hangs free. That sounds worse until you consider a broken collarbone: the weight of the hanging arm pulls the shoulder down and helps hold the fracture in a better position. Collarbone and upper-arm injuries are where this one belongs.
For a shoulder that has come out of joint or an upper arm that needs to stop rotating, add a swathe. That is a second strip of cloth wrapped around the chest and over the slung arm, binding the whole thing to the body. The arm stops swinging entirely.
Check Circulation Past the Sling, Then Check It Again
This is the step that gets skipped, and it is the one that turns a helpful sling into a harmful one.
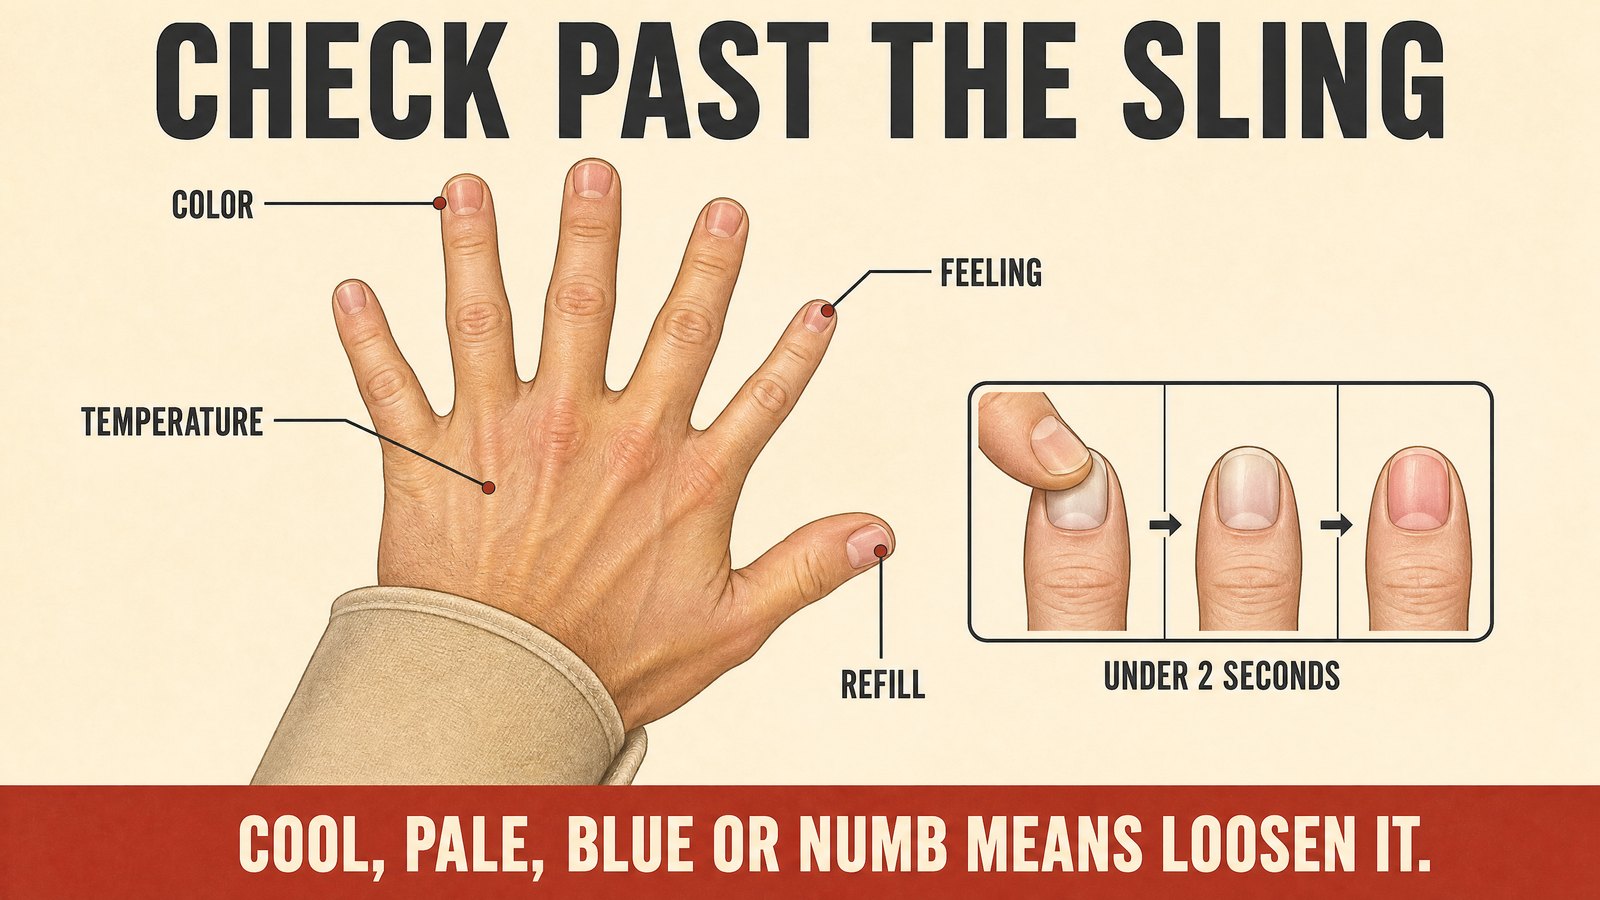
Every ten or fifteen minutes, and any time the person says something has changed, look at the exposed fingers on the injured side. You are checking four things: color, temperature, capillary refill, and sensation. Compare against the baseline you took before you tied anything.
Loosen the sling, and the bandage or splint under it, if the hand goes cool, if it turns pale or blue or grey, or if numbness or tingling appears where there was none. MedlinePlus lists exactly those triggers. Injuries to nerves and blood vessels travel with arm injuries often enough that this is not a remote possibility, and swelling keeps building for the first hour or two, so a sling that fit fine when you tied it can be too tight twenty minutes later.
If pain increases noticeably after you apply the sling, take it off. That is a signal, not something to push through.
When an Arm Sling Makes Things Worse
- The arm slopes downward. Swelling and pressure both go up. Get the hand above the elbow.
- The knot sits on the spine or the injured shoulder. It will be unbearable inside fifteen minutes and it can press directly on the injury.
- A forearm fracture goes in a sling with no splint. The sling holds the limb still as a whole while the broken bone keeps moving inside it.
- The person lives in the sling for weeks. A shoulder held in one position after an injury can stiffen into frozen shoulder, and OrthoInfo names immobilization as one of the ways it develops. Early movement is part of how clinicians prevent it. A sling is for getting to care, not a treatment plan. Whoever sees the injury decides how long it stays on.
- The neck or back might be injured too. After a fall from any real height, do not sit someone up and start tying cloth behind their neck. Leave them where they are and wait for EMS.
- The hand is already numb, pale or cold before you start. Do not tie anything. That is an emergency on its own.
When to Skip the Sling and Call 911
- Bone is visible, or there is an open wound over the injury
- The arm or hand is bent at an angle it should not be
- The hand is numb, tingling, pale, blue or cold to the touch
- Bleeding you cannot control with pressure
- The injury came with a head, neck or back impact
- The person is confused, very short of breath, or losing consciousness
- Pain that is severe and climbing rather than settling
A triangular bandage, a couple of safety pins and something rigid to splint with is not much to carry, and it is the difference between improvising with a stranger's hoodie in a parking lot and doing this properly in about ninety seconds. The 1stHour Trauma Kit puts the pieces in one bag, 82 of them, so the answer to "what do I have to work with" is already sitting in your truck. Learning the six steps takes one afternoon. Most people never do until the day they need them.
This content is for informational purposes only and does not constitute medical advice. A sling holds an injury still until someone qualified can assess it. Seek emergency care for any visible deformity, open wound, uncontrolled bleeding, or numbness, discoloration or coldness in the hand, and do not attempt to realign an injured limb.


