CPR on Children and Infants: How It Differs From Adult CPR
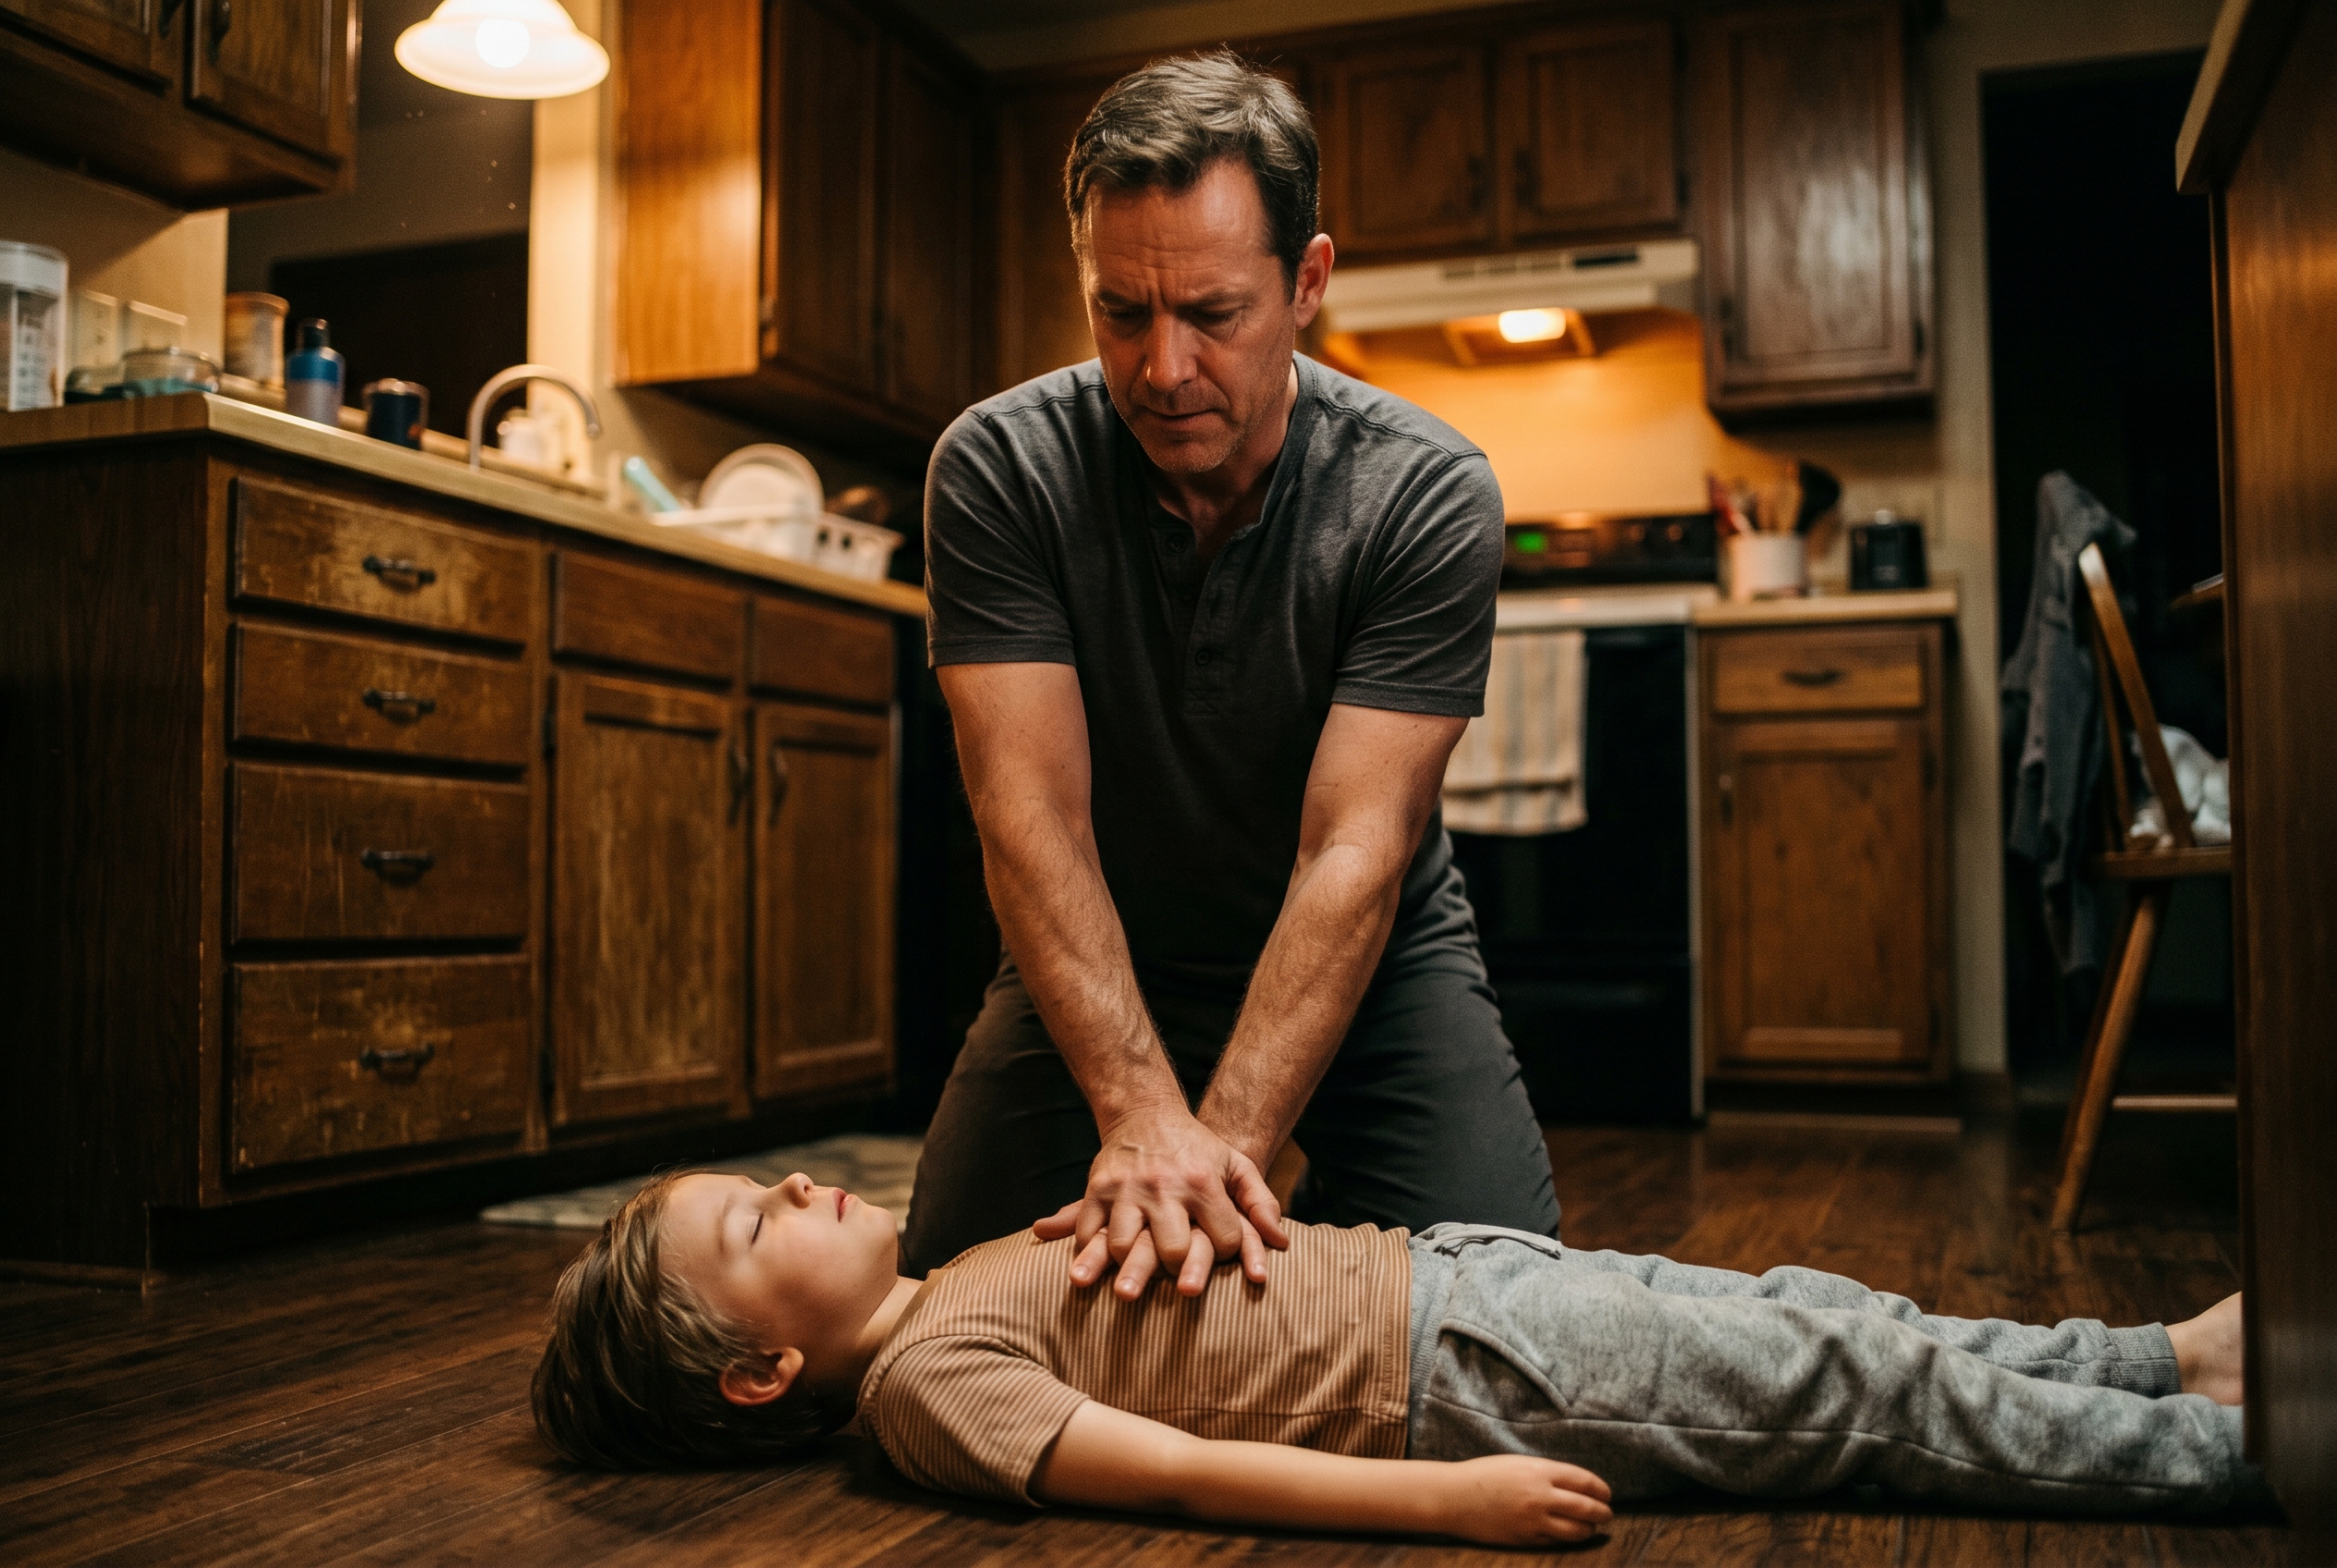
If a child stopped breathing in front of you right now, would you know what to do differently than for an adult? Most people don't — and most CPR courses gloss over it. You walk out knowing the basics, maybe confident enough to help a grown adult, but quietly uncertain about whether those same moves apply to a five-year-old or a six-month-old infant.
That uncertainty costs lives. Around 16,000 out-of-hospital pediatric cardiac arrests happen in the United States every year. Bystander CPR — the kind you do before EMS arrives — doubles or even triples a child's chances of survival. But only if you know how to do it right.
CPR on children vs adults isn't just a matter of scaling down the same moves. The differences exist for a real reason, rooted in how and why children's hearts stop in the first place. Understanding that reason will make the technique feel logical, not arbitrary — and that understanding could be the thing that saves a child's life.
Child and infant CPR uses shallower compressions, gentler force, and different hand placements than adult CPR. More importantly, rescue breaths are strongly recommended for children and infants — unlike adults, where hands-only CPR is often sufficient. This is because most pediatric cardiac arrests are caused by a breathing problem first, not a heart problem. Fixing the oxygen issue is critical.
Why Children's Hearts Stop Differently Than Adults'
Here's the insight that most CPR articles skip entirely: the reason a child's heart stops is usually different from the reason an adult's heart stops. That difference is what drives nearly every technique variation you'll learn in this guide.
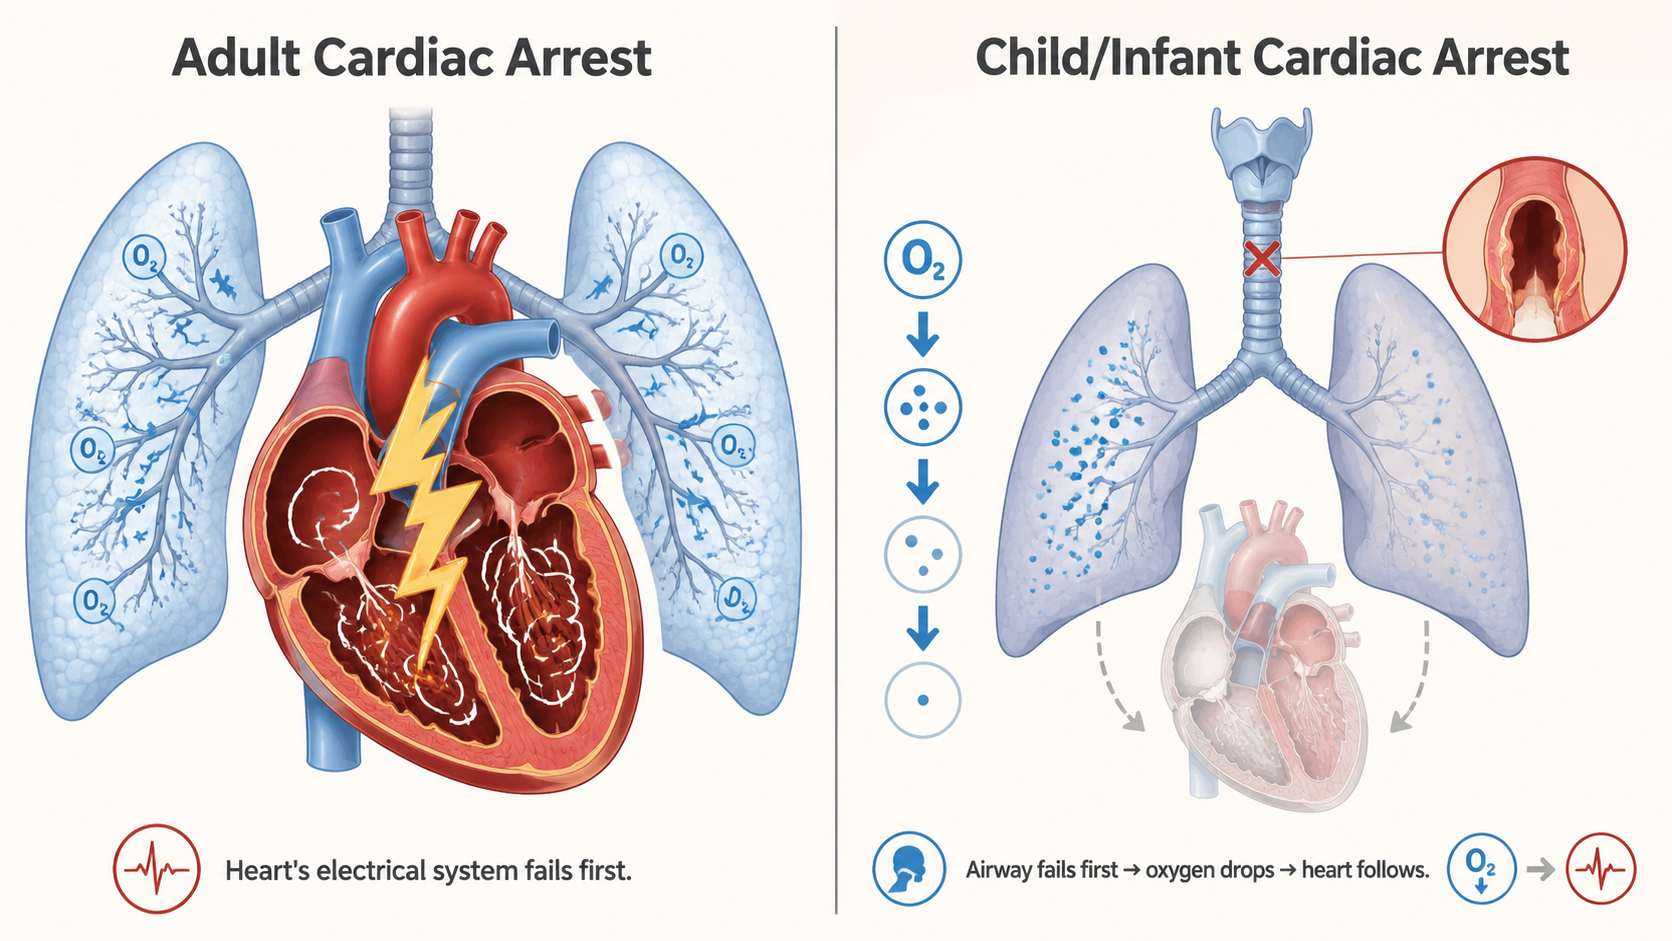
In adults, cardiac arrest is most often a primary heart event. The heart's electrical system fails — usually due to ventricular fibrillation — and the heart stops pumping. Oxygen is still getting into the lungs. The problem is distribution. That's why hands-only CPR works reasonably well for adults: you're buying time by keeping blood moving until a defibrillator can shock the heart back into rhythm.
Children are different. Approximately 65% of out-of-hospital pediatric cardiac arrests are respiratory in origin, according to the American Heart Association. The child's heart is usually fine — at least at first. What's failing is their ability to breathe. Choking, drowning, a severe asthma attack, respiratory illness, or sudden airway obstruction shuts down oxygen delivery. Once oxygen levels drop low enough, the heart follows. By the time a child's heart stops, they've often been oxygen-deprived for minutes.
This is why rescue breaths matter so much for children. You're not just keeping blood moving — you're trying to reverse the underlying cause of the arrest. Getting oxygen back into those lungs can restart the whole cascade in the right direction.
CPR on Children vs Adults vs Infants: Quick Comparison
Before we walk through the step-by-step technique for each age group, here's a side-by-side breakdown of the key differences. Keep this as a reference — it's the clearest way to see what changes and what stays the same.
| Feature | Adult | Child (1 to Puberty) | Infant (Under 1 Year) |
|---|---|---|---|
| Age range | Puberty and older | 1 year to puberty | Under 1 year |
| Compression depth | At least 2 inches | ~2 inches (1/3 chest depth) | ~1.5 inches (1/3 chest depth) |
| Hand technique | Two hands, heel of hand | One or two hands (heel of hand) | Two fingers or two-thumb encircling |
| Compression-to-breath ratio | 30:2 (1 or 2 rescuers) | 30:2 (1 rescuer); 15:2 (2 rescuers) | 30:2 (1 rescuer); 15:2 (2 rescuers) |
| Compression rate | 100-120 per minute | 100-120 per minute | 100-120 per minute |
| Rescue breath coverage | Mouth only (pinch nose) | Mouth only (pinch nose) | Cover both mouth AND nose |
| Pulse check location | Carotid (neck) | Carotid (neck) | Brachial (inside upper arm) |
| Head tilt | Tilt-chin lift (full) | Tilt-chin lift (moderate) | "Sniffing position" (neutral/slight) |
| Hands-only CPR recommended? | Yes, for witnessed arrest | No — rescue breaths recommended | No — rescue breaths recommended |
How to Do CPR on a Child (Ages 1 to Puberty) — Step by Step
For CPR purposes, "child" means anyone from one year old up through the onset of puberty. In a real emergency, you won't be checking birth certificates — use your judgment based on physical size. If they're clearly a small child, use child technique.
Before you start compressions
- Check the scene. Make sure it's safe to approach — traffic, water, downed power lines.
- Check for responsiveness. Tap the child's shoulders firmly and call their name. "Are you okay? Can you hear me?"
- Call 911 (or have someone else call). If you're alone, call 911 and put it on speaker before starting CPR. If someone else is present, send them to call and find an AED while you begin.
- Position the child. Lay them face-up on a firm, flat surface.
Compressions
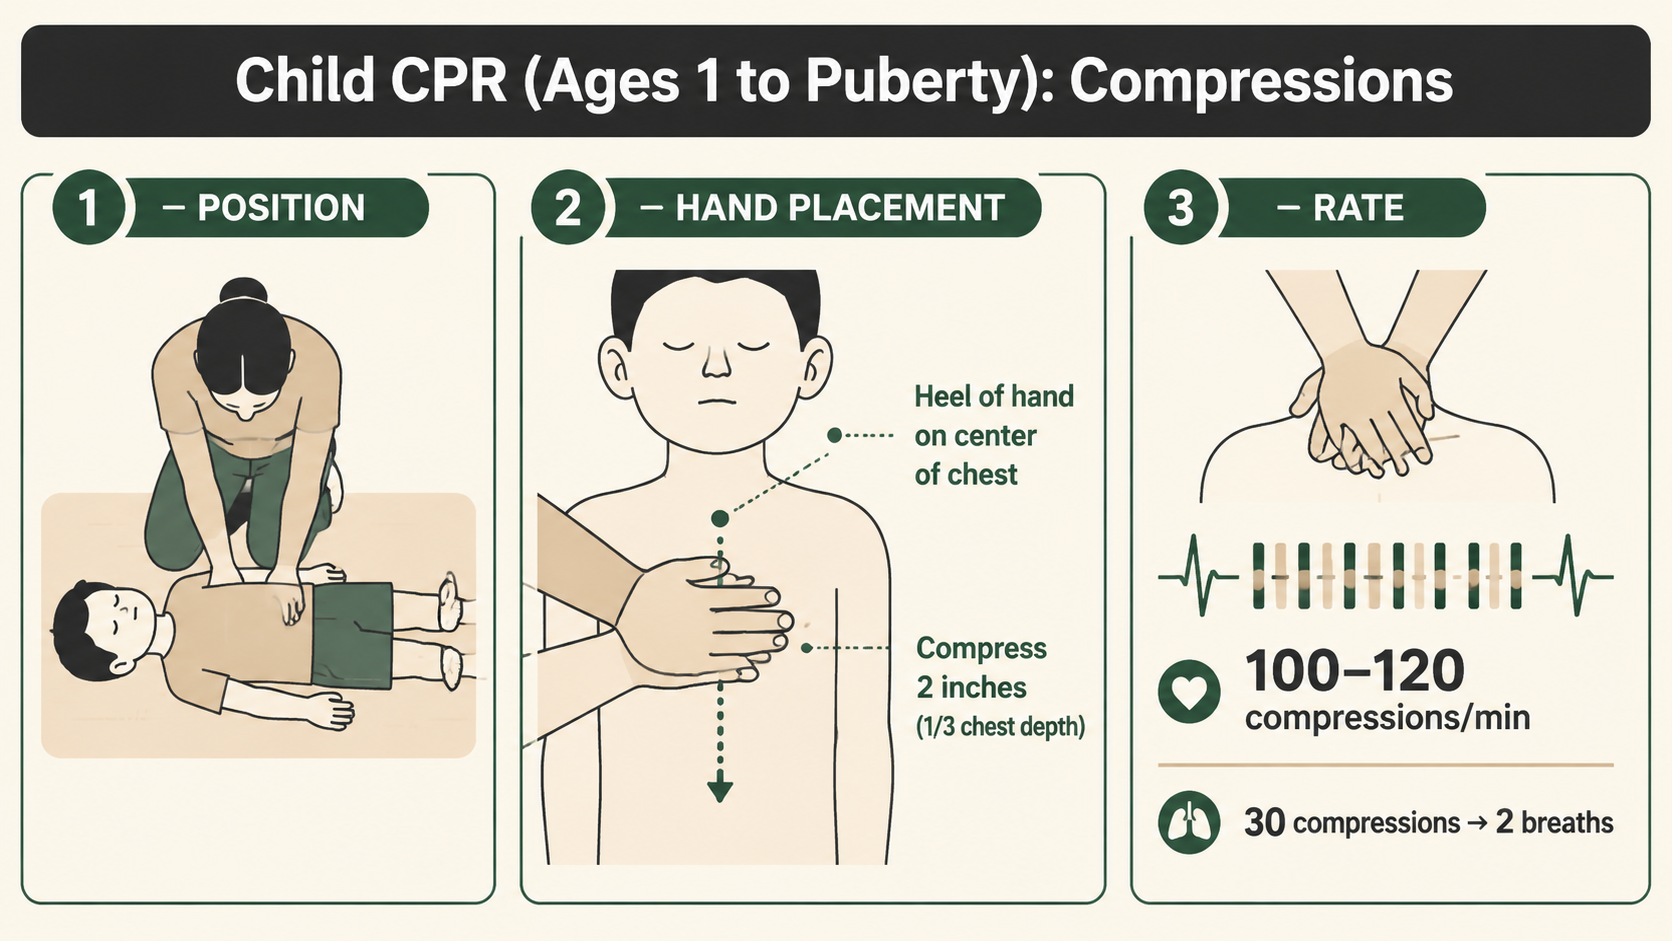
- Kneel beside the child's chest.
- Place the heel of one hand on the center of their chest — on the lower half of the breastbone, between the nipples.
- For larger children, you can use two hands (one on top of the other) for more force.
- Keep your arms straight and compress down about 2 inches — roughly one-third the depth of the chest.
- Allow full chest recoil between compressions. Don't lean on the chest between pushes.
- Compress at a rate of 100-120 per minute. Think of the beat of "Stayin' Alive" by the Bee Gees — seriously, it works.
- Complete 30 compressions.
Rescue breaths
- After 30 compressions, gently tilt the head back and lift the chin to open the airway. Don't hyperextend — a moderate tilt is right for children.
- Pinch the child's nose shut with two fingers.
- Create a seal over their mouth with yours.
- Give 2 gentle rescue breaths. Each breath should last about 1 second — watch for the chest to rise. If it doesn't rise, reposition the head and try again.
- Return immediately to 30 more compressions.
Continue the 30:2 cycle — 30 compressions, 2 breaths — until EMS arrives, an AED is ready to use, or the child begins breathing on their own.
How to Do CPR on an Infant (Under 1 Year Old) — Step by Step
Infant CPR makes a lot of people nervous, and understandably so. These are tiny, fragile-seeming bodies, and the fear of causing injury is real. But here's what you need to hold onto: if an infant isn't breathing and has no pulse, they are already in the worst possible situation. Acting is always better than freezing.
The principles are the same as child CPR — you're maintaining circulation and getting oxygen in — but the technique is scaled down significantly.
Before you start
- Check responsiveness. Flick the bottom of the infant's foot. Call to them. Speak loudly. Do not shake the baby.
- Call 911. If you're alone, give 2 minutes of CPR first, then call — unlike with older children (where you call first), infant arrests are almost always respiratory, and those two minutes of early CPR can be the difference. The infant's heart hasn't had time to fully arrest yet; oxygen is what it needs right now. If someone else is present, have them call immediately while you start CPR.
- Lay the infant on a firm surface. A table, floor, or your forearm works.
Pulse check
For infants, you check for a pulse at the brachial artery — the inside of the upper arm, between the shoulder and elbow. Press two fingers gently against the inner arm. If you can't feel a pulse within 10 seconds, or if the heart rate is below 60 beats per minute with signs of poor perfusion, begin CPR.
Compressions
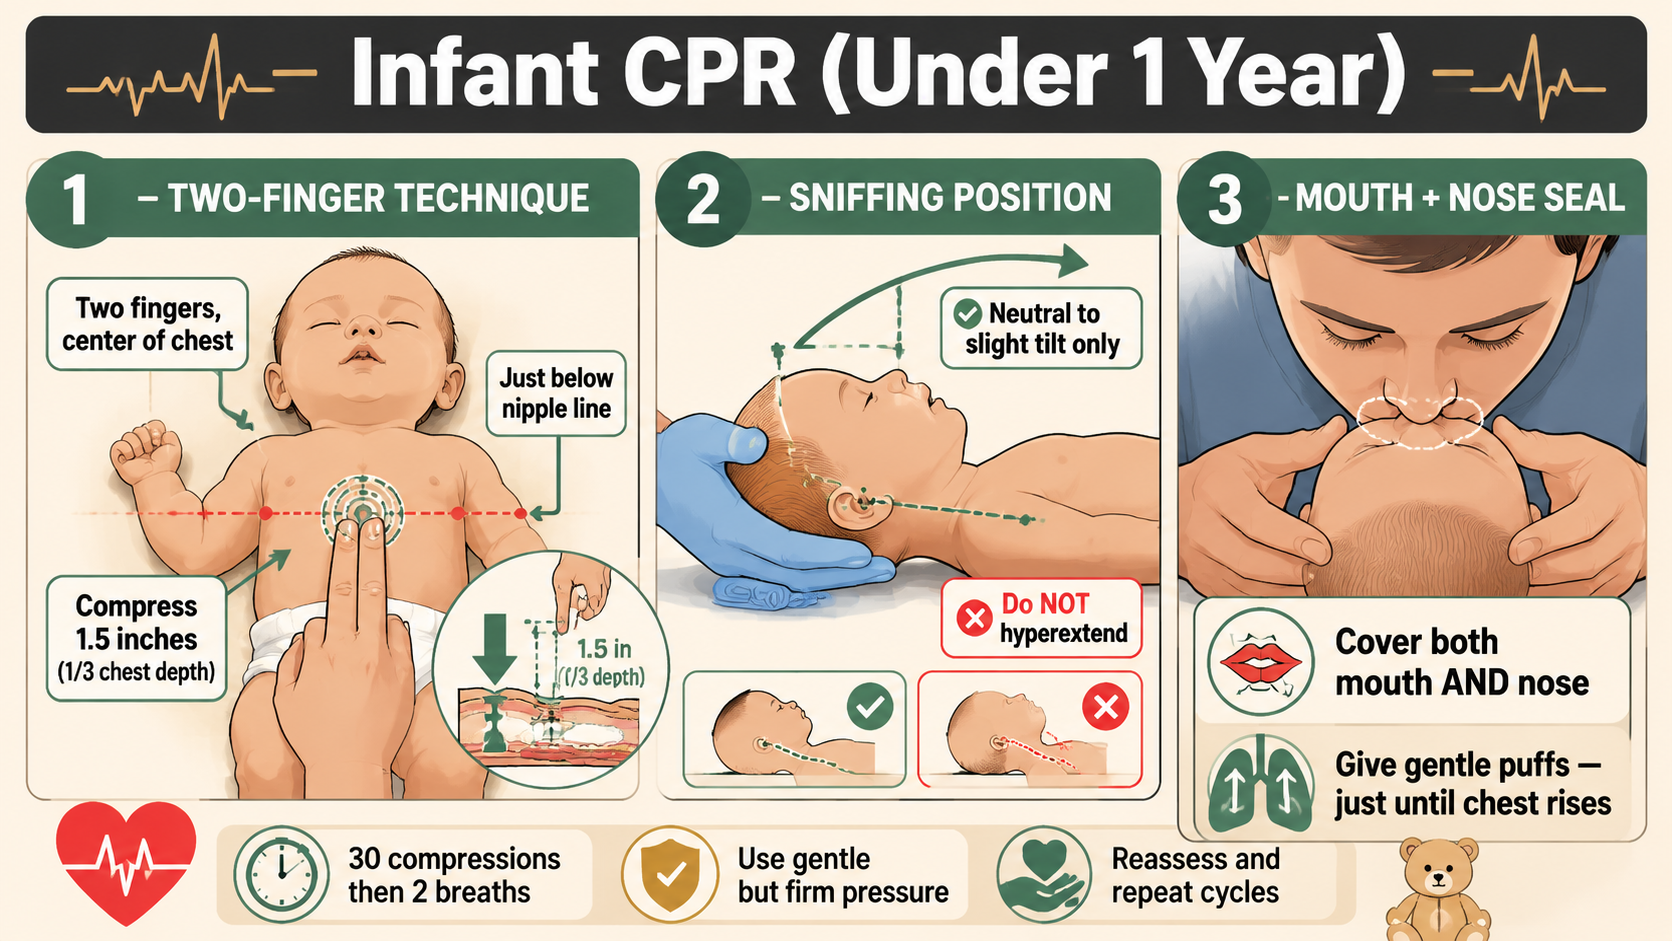
- Place two fingers on the center of the infant's chest — just below the nipple line, on the lower half of the breastbone.
- If a second trained rescuer is present, use the two-thumb encircling technique instead: wrap both hands around the torso and use both thumbs side by side on the breastbone. This is more effective but requires a second set of hands.
- Compress down about 1.5 inches — one-third the depth of the infant's chest.
- Allow full recoil between compressions.
- Rate: 100-120 compressions per minute — same as adults and children.
- Complete 30 compressions.
Rescue breaths
- Gently tilt the infant's head back to the "sniffing position" — a neutral to slight tilt. Do not hyperextend the neck. An infant's airway can actually kink if the head is tilted too far back.
- Cover both the infant's mouth and nose with your mouth — infant faces are small enough that this is the correct technique.
- Give 2 gentle puffs of air — very small breaths, just enough to see the chest rise. Think of the air in your cheeks, not a full lung breath.
- Return to 30 compressions.
If you're the only rescuer, use the 30:2 ratio. If there are two trained rescuers, switch to 15 compressions to 2 breaths — the AHA's recommendation for two-rescuer infant and child CPR.
The Hands-Only CPR Question: Should You Skip Rescue Breaths?
Over the past decade, "hands-only CPR" campaigns have done a lot of good for adult cardiac arrest survival. The message — that bystanders who are uncertain about rescue breaths should just do compressions — has gotten more people acting in emergencies. That's a genuine win.
But the message has also created a dangerous misconception for pediatric emergencies.
Hands-only CPR is not the recommended standard for children or infants.
The American Heart Association's 2020 CPR Guidelines are clear on this: rescue breaths are recommended for pediatric victims. Because most pediatric arrests are caused by a respiratory problem — not a primary heart event — the oxygen component of CPR is critical. Compressions alone circulate deoxygenated blood. That doesn't fix the underlying problem.
The hands-only recommendation exists for adult witnessed cardiac arrest, particularly for bystanders who are CPR-trained but uncertain about technique, or who are unwilling to give rescue breaths to a stranger. For that scenario — an adult who collapses in front of you with a likely primary cardiac event — compressions alone are better than nothing and still significantly improve outcomes.
For a child or infant, rescue breaths matter. They are part of the intervention.
That said: if you genuinely cannot give rescue breaths — you're physically unable, there's a barrier you can't overcome — chest compressions alone are still vastly better than doing nothing. Don't let the perfect be the enemy of the possible. Start compressions. Keep going.
For adults, see our full guide on hands-only CPR — it covers the technique, when it applies, and the evidence behind it.
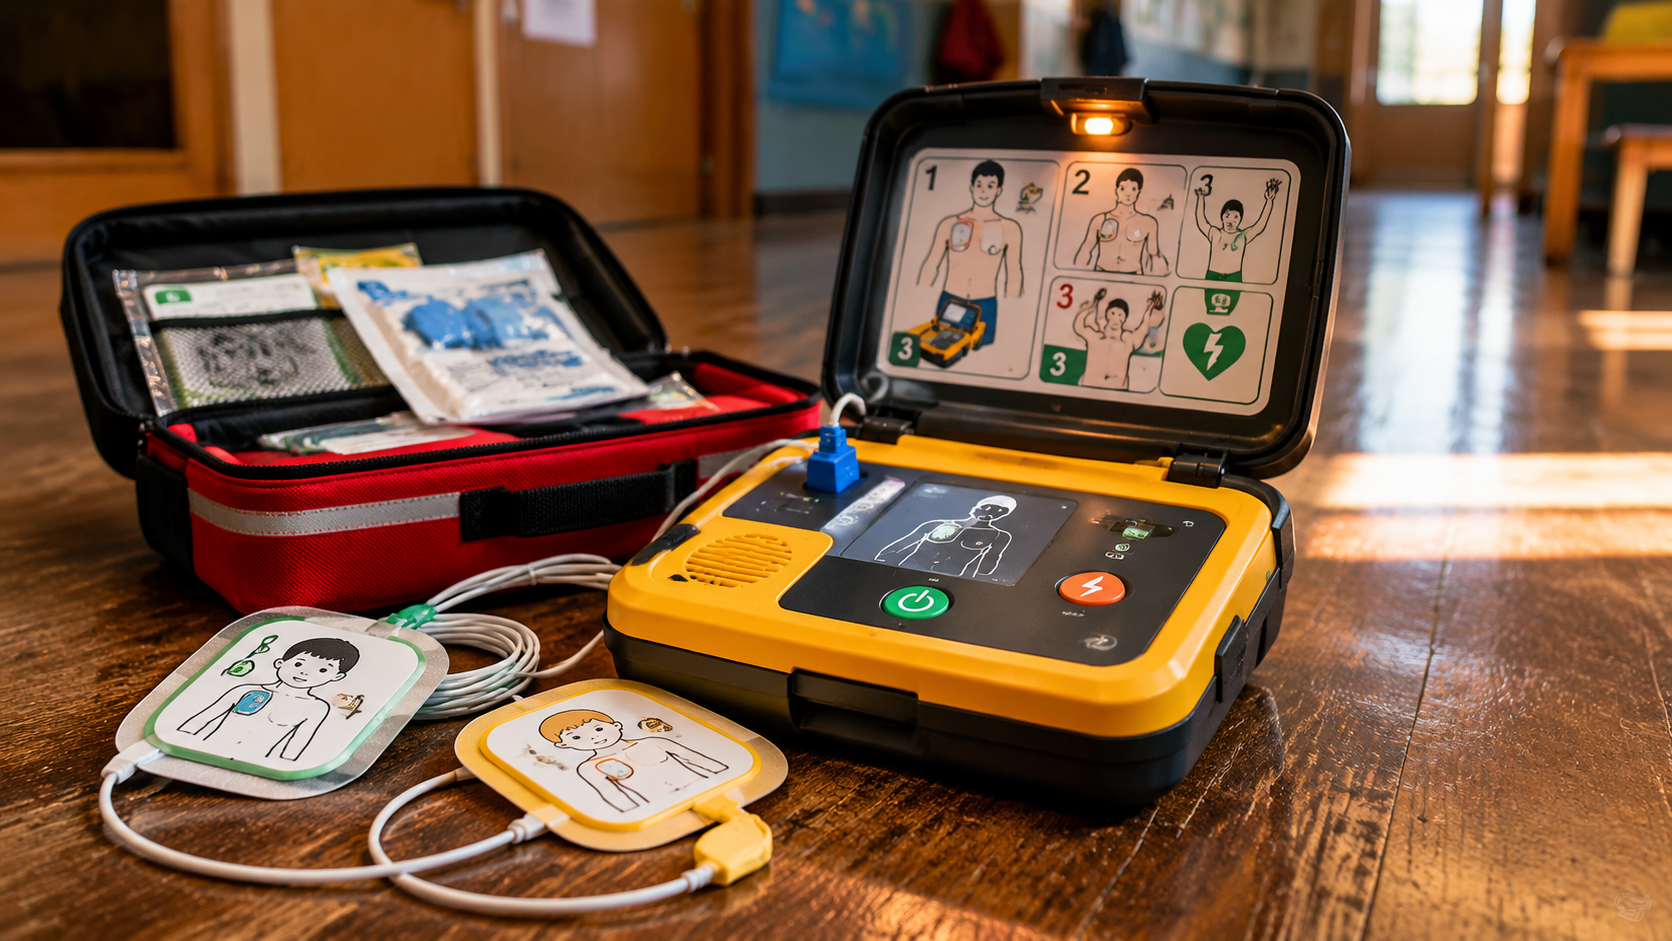
Using an AED on a Child or Infant
AEDs — automated external defibrillators — save lives in adult cardiac arrests, and they can save children's lives too. But there are some important nuances that most AED guides don't explain well.
Children under 8 or under 55 lbs
Most AEDs come with two sets of pads: adult pads and pediatric pads. Pediatric pads reduce the energy delivered by the shock, making it appropriate for a smaller body. If the AED has pediatric pads or a pediatric mode, use it for children under 8 years old or under approximately 55 pounds.
If no pediatric pads are available, use adult pads. Place one pad on the child's chest (front) and one on their back, rather than both on the front — this prevents the pads from touching each other on a smaller chest. An adult AED with adult pads is still better than no AED.
Infants
The AHA recommends a manual defibrillator for infants rather than an AED, because infant dosing requires more precision. In practice, most bystanders won't have access to a manual defibrillator. If an AED is available and an infant is in cardiac arrest, use it — if it has an infant mode. If the AED does not have an infant or pediatric mode, your priority should remain high-quality CPR until EMS arrives with proper equipment.
The most important thing to know about AEDs
They are designed to be used by non-medical people. Turn it on. Follow the voice prompts. The machine will analyze the heart rhythm and tell you whether a shock is needed. You cannot shock a heart that doesn't need it — the AED will refuse. Follow the prompts, let the machine do its job, and keep doing CPR between shocks.
For a full walkthrough of AED setup and operation, see our step-by-step AED guide.
What to Do After CPR Starts — and How to Keep Going
Starting CPR is the hard part. Sustaining it — alone, in a panic, waiting for EMS — is the part nobody talks about.
EMS response times in the US average 7 to 10 minutes in urban areas, and longer in suburban or rural settings. That means you may be doing CPR for the better part of 10 minutes before help arrives. That's exhausting, both physically and psychologically. Here's what to keep in mind.
Don't stop until you have to
Continue CPR until: EMS takes over, the child begins breathing and moving on their own, an AED advises you to stop for a shock analysis, or you are physically unable to continue. If there are multiple bystanders, rotate the person doing compressions every two minutes to maintain quality.
What EMS needs to know
When paramedics arrive, tell them: what happened (what you observed), when CPR was started, how many cycles have been given, and whether an AED was used. This information shapes their immediate intervention decisions. You don't have to have all the answers — just give them what you know.
You will not make it worse
One of the biggest fears parents and caregivers have is hurting a child by doing CPR. Yes, rib fractures can occur — in adults and rarely in children. That is a survivable injury. A child without oxygen is not. If a child has no pulse and is not breathing, CPR cannot make their situation worse. It is the only thing that gives them a chance. Do it.
The best way to feel confident in this moment is to practice before it happens. Understanding the golden hour in emergencies — and why the first minutes of response matter so much — is part of being genuinely prepared.
Getting certified matters too. Knowing the technique in your head is useful. Having muscle memory from practice is the thing that will actually carry you through when adrenaline is flooding your system and a child is on the floor in front of you. Find a certified Infant and Child CPR class through the American Red Cross or the American Heart Association. Both offer hands-on courses specifically for pediatric CPR.
Ready to go further? Browse all 1st Hour guides on emergency preparedness, first aid, and life-saving skills — written for real people who want to be ready when it counts. Explore the 1st Hour library →
This content is for educational purposes only and is not a substitute for professional medical training. CPR guidelines and techniques are updated periodically by the American Heart Association and the American Red Cross. The information in this article is based on AHA 2020 CPR Guidelines and current Red Cross standards. Always seek hands-on CPR certification from a qualified instructor — reading about a skill is not the same as practicing it. In any medical emergency, call 911 immediately.


