How to Stop Severe Bleeding: A Step-by-Step Guide
Knowing how to stop severe bleeding is the single most important emergency skill a civilian can learn. Uncontrolled hemorrhage kills faster than cardiac arrest in trauma — and the person standing closest to the injury is almost always the one who decides the outcome.
This is a field guide. Every second you spend reading instructions during an emergency is a second the clock is running. The goal here is to put the steps into your head now, so your hands already know what to do when it matters. For the recognition side — what bleeding out looks like, how fast it escalates, and the warning signs that tell you when to act — read What Is Bleeding Out first.
The framework is called the STOP protocol — Scene safety, Tourniquet decision, Ongoing pressure, Positioning for EMS. Every technique below has been validated in both military and civilian trauma medicine. None of them require a medical degree. All of them require confidence, pressure, and speed.
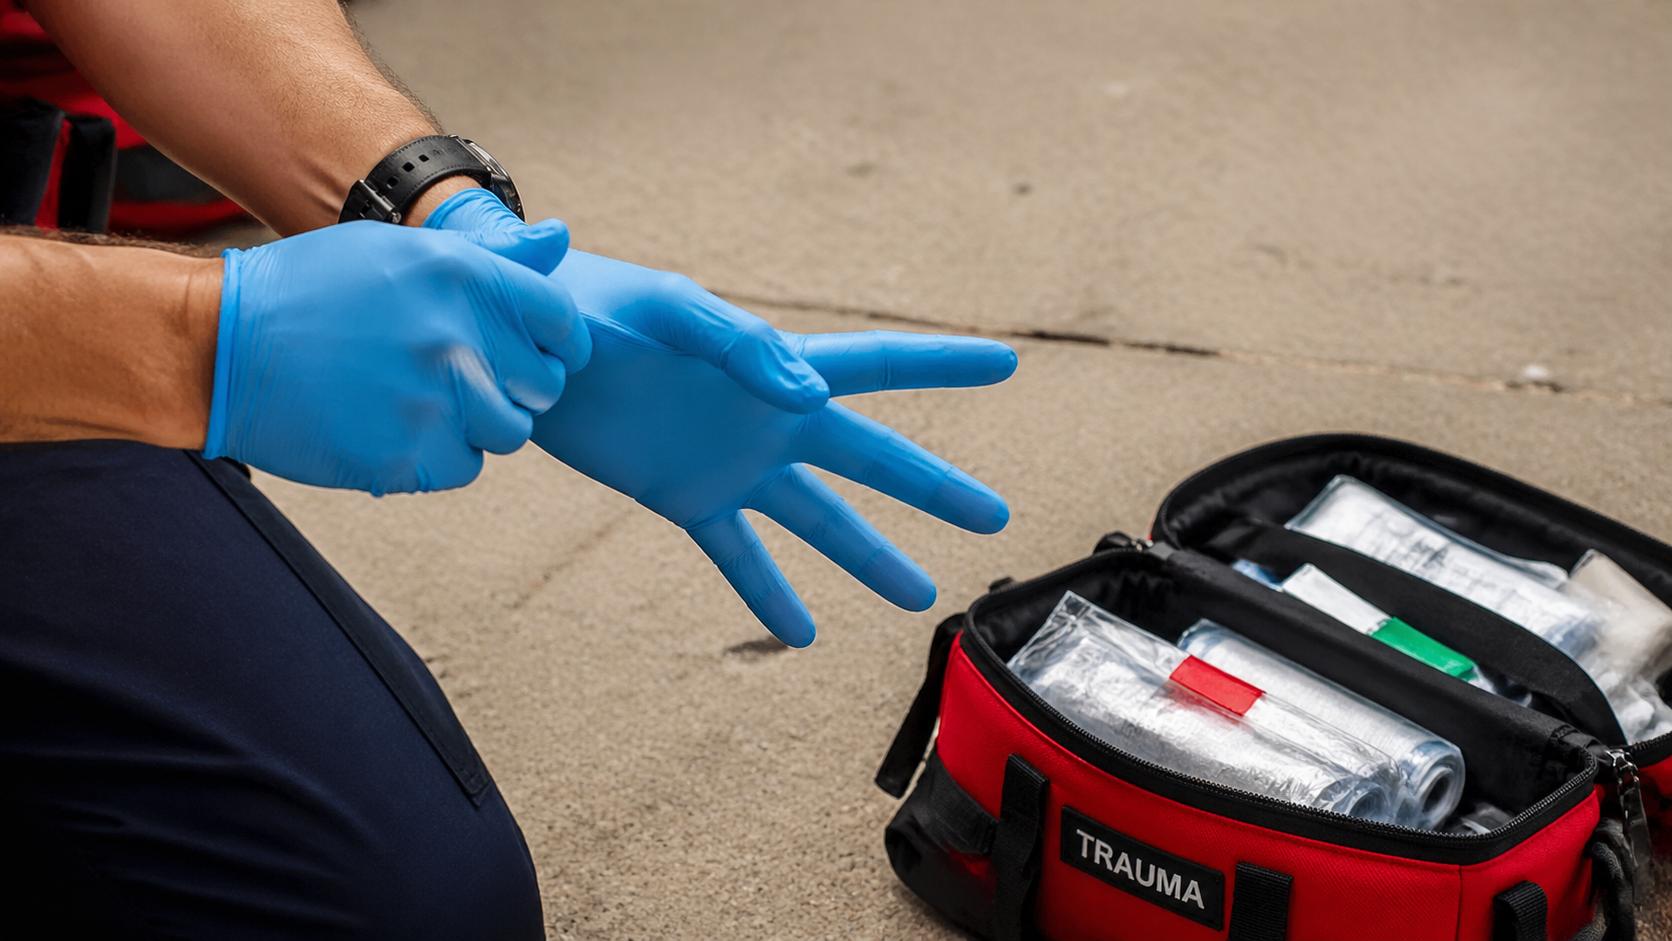
- Ensure scene safety. Glove up if possible.
- Apply firm, direct pressure to the wound — directly on bare skin, hard, with both hands.
- Pack deep or cavity wounds with gauze before applying pressure.
- If a limb wound won't stop, apply a tourniquet 2–3 inches above and twist until bleeding stops.
- Call 911. Keep pressure on. Monitor for shock.
The First 60 Seconds: Scene Safety and Triage
Before you touch anything, take five seconds to assess the scene. This isn't hesitation — it's discipline. A rescuer who becomes a second casualty helps no one.
Check for ongoing threats. Is the cause of the injury still active? Downed power lines, an unstable vehicle, an active aggressor — if the scene isn't safe, your priority is making it safe or moving the injured person to safety before starting treatment.
Put on gloves. If you have nitrile gloves in a kit, put them on. Bloodborne pathogens are real. But if gloves aren't available, do not delay treatment — bare hands on a wound are better than no hands on a wound.
Identify the worst bleed. If there are multiple wounds, go to the one that's bleeding fastest. Spurting, bright-red blood means arterial involvement — that's the one that kills in minutes. Steady, dark-red flow is venous — serious, but you have slightly more time.
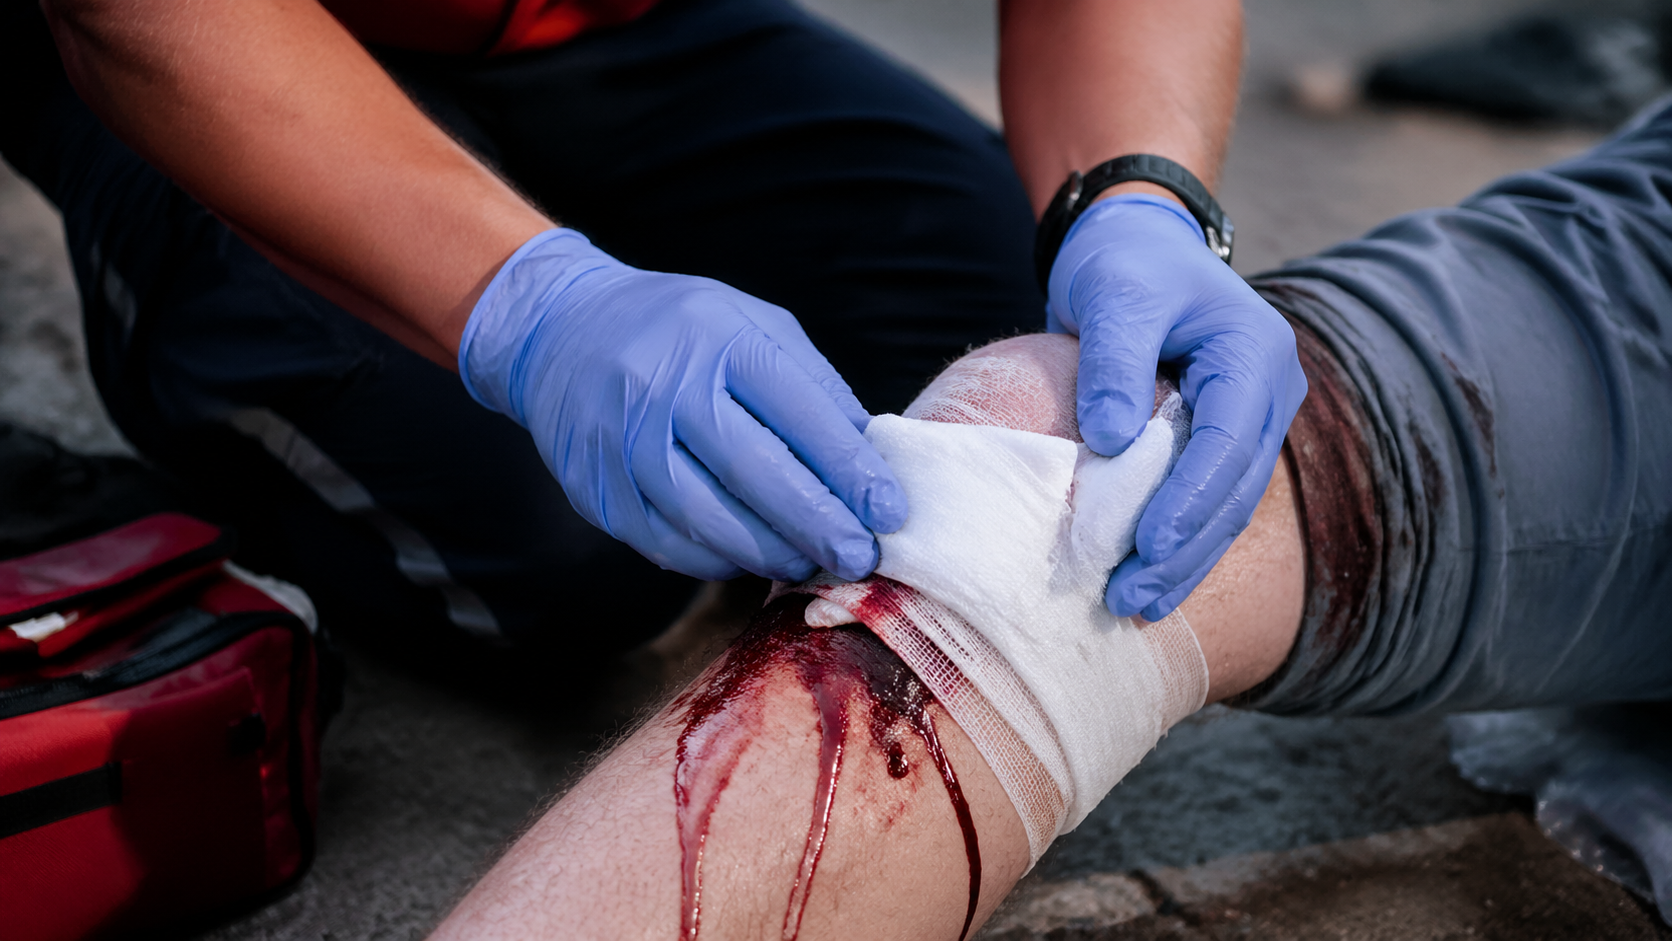
Direct Pressure: The Foundation of Hemorrhage Control
Direct pressure is the first-line intervention for nearly every external bleed. It's simple, it's immediate, and it works — if you do it correctly.
The number one mistake people make is pressing too lightly. Effective pressure hurts. You're compressing tissue and blood vessels with enough force to physically stop the flow. If your arms aren't tired, you're probably not pressing hard enough.
How to Apply Direct Pressure
- Expose the wound. Cut or tear away clothing to see exactly where the blood is coming from. You need to place pressure directly on bare skin at the wound site — pressing over fabric hides the bleed and reduces effectiveness.
- Place material directly on the wound. Hemostatic gauze is ideal. Sterile gauze is next. A folded clean cloth works in a pinch. What matters is contact — the material must sit directly against the open wound.
- Press hard with both hands. Stack your hands, lock your elbows, and lean your body weight into the wound. You should be pressing with the same force you'd use for CPR chest compressions.
- Hold for a minimum of five minutes. Do not lift the dressing to check. Every time you release pressure, you break the forming clot and restart the clock. Five minutes feels long. Set a mental timer and commit.
- If blood soaks through, add more material on top. Do not remove the saturated layer. Pulling it off tears away the clot. Stack a fresh layer over it and keep pressing.

Wound Packing: When the Wound Is Too Deep for Surface Pressure
Some wounds can't be controlled with surface pressure alone. Stab wounds, deep lacerations, and gunshot wounds create cavities inside the body where blood pools faster than external pressure can contain it. That's when you pack the wound.
Wound packing fills the internal space so pressure can be applied from the inside out. It's more invasive than direct pressure, and it feels aggressive — but for deep wounds, it's the technique that stops the hemorrhage.
How to Pack a Wound
- Expose and identify the wound cavity. Cut away clothing so you can see the full extent of the injury on bare skin.
- Use hemostatic gauze if available. Hemostatic agents (like QuikClot Combat Gauze) accelerate clotting on contact. If you only have regular gauze or cloth, use that — it's still effective when packed tightly.
- Feed the gauze into the deepest point of the wound first. Use your index finger to push material to the bottom of the cavity. Pack firmly — you're filling space, not dabbing gently.
- Continue packing until the cavity is completely filled. The gauze should be tight enough that it creates internal pressure against the bleeding vessels.
- Apply direct pressure on top of the packed wound. Both hands, body weight, five minutes minimum. The packing inside works in concert with your external pressure.
Wound packing is not comfortable for anyone involved. The injured person will likely react strongly. That reaction means you're doing it right — the gauze is making contact with raw tissue, which is exactly where it needs to be.

Tourniquet Application: When Limb Bleeding Won't Stop
A tourniquet is a strap-and-windlass device that completely occludes blood flow to a limb. It is the most effective single tool for stopping life-threatening extremity bleeding — and for decades, civilians were told never to use one. That guidance was wrong.
Modern trauma medicine is clear: tourniquets save limbs and lives. The risk of tissue damage from a properly applied tourniquet is minimal compared to the certainty of death from uncontrolled arterial hemorrhage. Hesitation kills. The tourniquet does not.
When to Go Straight to the Tourniquet
- Bright-red blood spurting from an arm or leg wound
- A partial or complete amputation
- Direct pressure has failed after two to three minutes of sustained effort
- The wound is too large or mangled to pack effectively
- You're dealing with multiple casualties and can't maintain constant pressure on one person
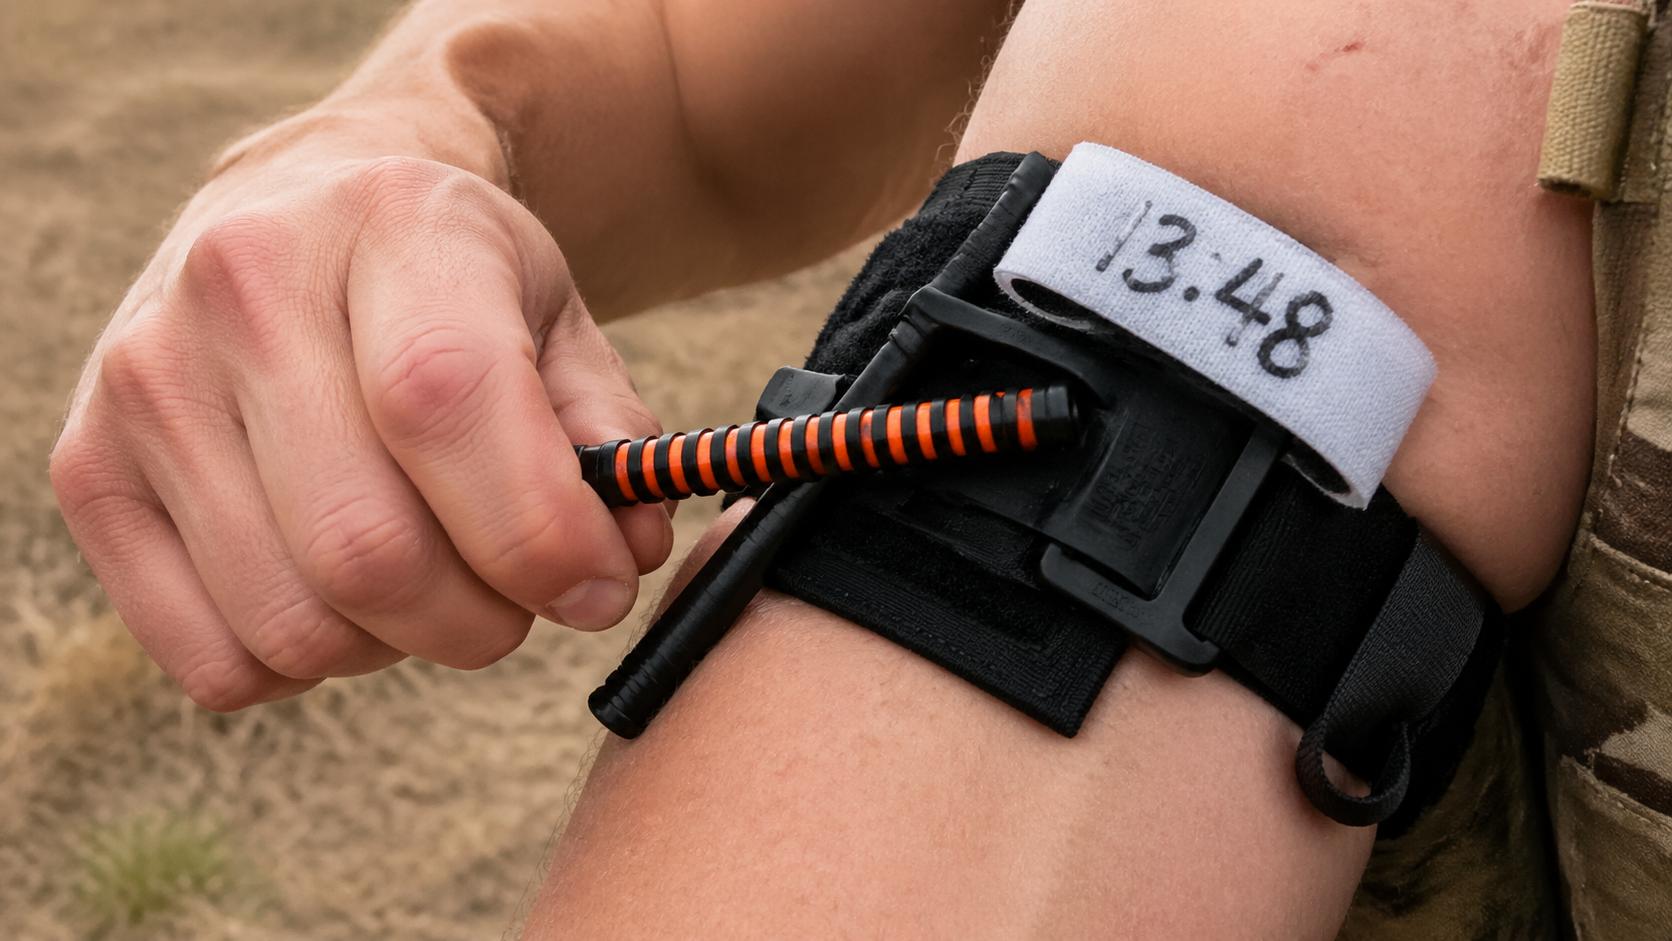
How to Apply a Tourniquet
- Position the tourniquet 2–3 inches above the wound. Never place it directly over a joint (elbow or knee) — it won't compress the artery effectively there. Place it on the meaty part of the limb, between the wound and the heart.
- Pull the band tight and secure it through the buckle. It should already be snug before you touch the windlass.
- Twist the windlass rod until bleeding stops completely. This will cause significant pain in a conscious person. That pain is expected and correct — it means the device is generating enough pressure to occlude the artery.
- Lock the windlass in the retaining clip. It must stay locked. An unsecured windlass will unwind and the bleed will resume.
- Write the time of application on the tourniquet band or the person's forehead. Use a permanent marker. EMS and trauma surgeons need this information. Write "TQ" followed by the time in 24-hour format.
- Do not remove the tourniquet. Once applied, only a physician in a controlled medical setting should release it.
The CAT (Combat Application Tourniquet) and SOFTT-W are the two most field-proven commercial tourniquets. Improvised tourniquets — belts, zip ties, torn fabric — rarely generate enough circumferential pressure to occlude arterial flow. Carry a real one.
After the Bleed Is Controlled: Monitoring and Handoff
Stopping the hemorrhage is step one. Keeping the person alive until EMS arrives is step two.
Call 911 — Specifically
Point at one person. Make eye contact. Say: "You — call 911 right now and tell them we have severe bleeding." In group settings, the bystander effect is real. A general shout gets ignored. A direct command gets action.
Watch for Shock
Hemorrhagic shock sets in as blood volume drops. The signs escalate in a predictable sequence:
- Rapid, weak pulse — the heart speeds up to compensate
- Pale, cool, clammy skin — blood redirects to core organs
- Confusion or agitation — the brain is getting less oxygen
- Rapid, shallow breathing
- Loss of consciousness
If you see these signs, tell the 911 dispatcher. Keep the person lying flat. Cover them with a jacket or blanket — hypothermia accelerates shock. Talk to them. A calm voice keeps them conscious longer.
Brief EMS on Arrival
When paramedics arrive, give them three things immediately: what happened, what you did, and when you did it. If a tourniquet is on, tell them the exact application time. Step back and let them take over — but stay available for questions.
Build Your Kit Before You Need It
Every technique in this guide assumes you have the right tools within reach. Here's what a hemorrhage control kit should contain:
- Tourniquet (CAT or SOFTT-W) — the single most important item. Carry at least one.
- Hemostatic gauze (QuikClot Combat Gauze) — clotting-agent-treated gauze for packing deep wounds.
- Pressure bandage (Israeli bandage) — self-contained bandage with built-in pressure bar for sustained compression.
- Nitrile gloves (2 pairs) — bloodborne pathogen protection.
- Trauma shears — cut through clothing, seatbelts, or bootlaces to expose wounds fast.
- Permanent marker — for recording tourniquet time.
- Chest seal (vented) — for penetrating chest injuries; critical in backcountry or high-risk environments.
Where to stage it: center console or behind the driver's seat in your vehicle, not in the trunk. In your hiking pack's top lid pocket. At your workstation. Beside the first-aid kit at home — not buried underneath it. A kit you can't reach in 15 seconds is a kit that won't get used.

1st Hour builds hemorrhage control kits that match this exact checklist — compact enough to stage in your vehicle, your pack, or your desk drawer. Real tools for real emergencies. See the full lineup at 1sthour.com.
Train Before the Emergency, Not During It
Reading this guide is a start. Hands-on practice is what builds the muscle memory that works under stress. The Stop the Bleed campaign, backed by the American College of Surgeons, offers free two-hour courses in cities across the country. Additional clinical guidance is available from MedlinePlus (NIH).
Take a course. Practice with your tourniquet until you can apply it one-handed in under 30 seconds. Run through the sequence — expose, press, pack, tourniquet — until it's automatic. That rehearsal is the difference between freezing and acting.
The first hour after a traumatic injury is when the outcome is decided. Everything that happens in an emergency room is downstream of what happens in those initial minutes. This guide gave you the steps. The rest is practice and willingness.


